
Getting started: create your account & log in
The Alogo Performance platform is available on every device. Use the same account everywhere. Your sessions stay in sync.
💻 On a computer
Open app.alogo.io and log in or create your Alogo account. The WebApp works best with Google Chrome.
📱 On smartphone or iPad
Download the Alogo Performance app:

Both links are also available on alogo.io.
Good practices before you ride
1 · Get a good GPS signal
Note: the GPS is not mandatory to start a session, but without it, some data will be missing (see GPS: why it matters).
- The first time you use your Alogo at a new location, or each day, turn your Alogo ON early enough before collecting data and let it find the GPS signal outdoors.
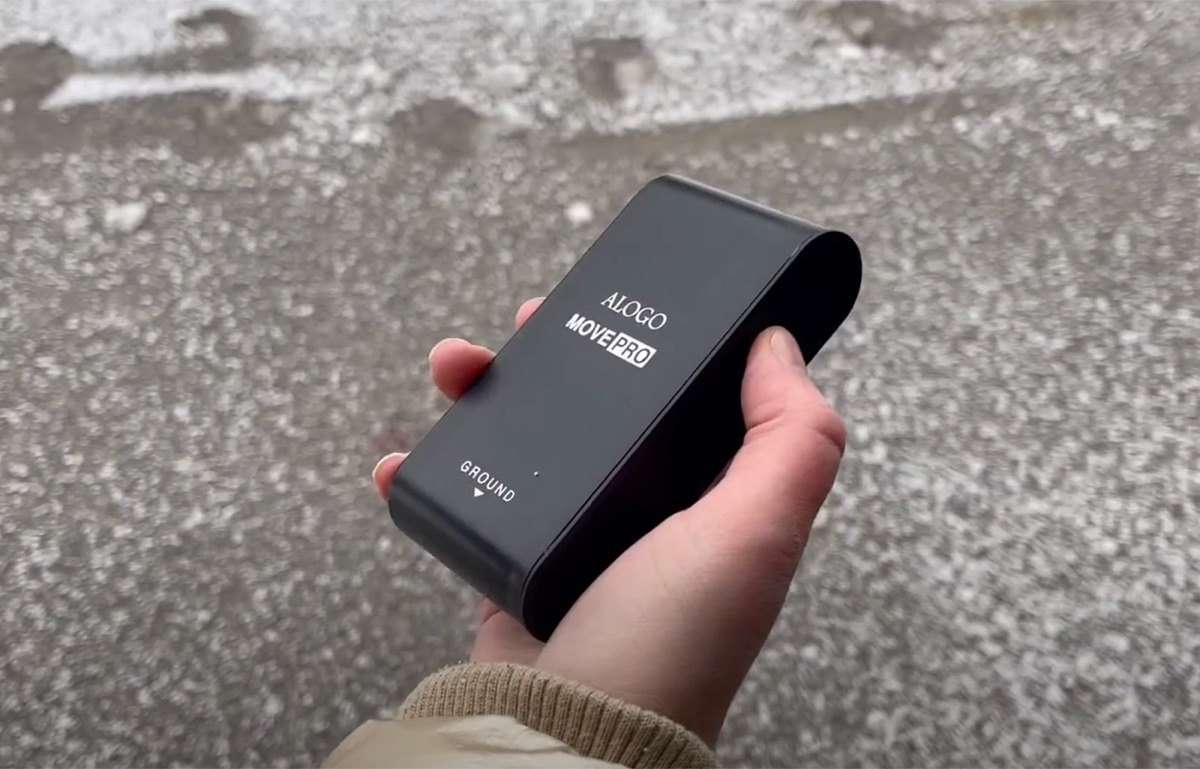
- You can hold the sensor in your hand and wait until the GPS signal is found, the face marked ALOGO pointing up to the clear sky.
2 · Tack your Alogo correctly
- Ensure the sensor holder remains stable and does not move front/back during the workout.
- If there is too much movement, use another holder.
3 · Respect the calibration process
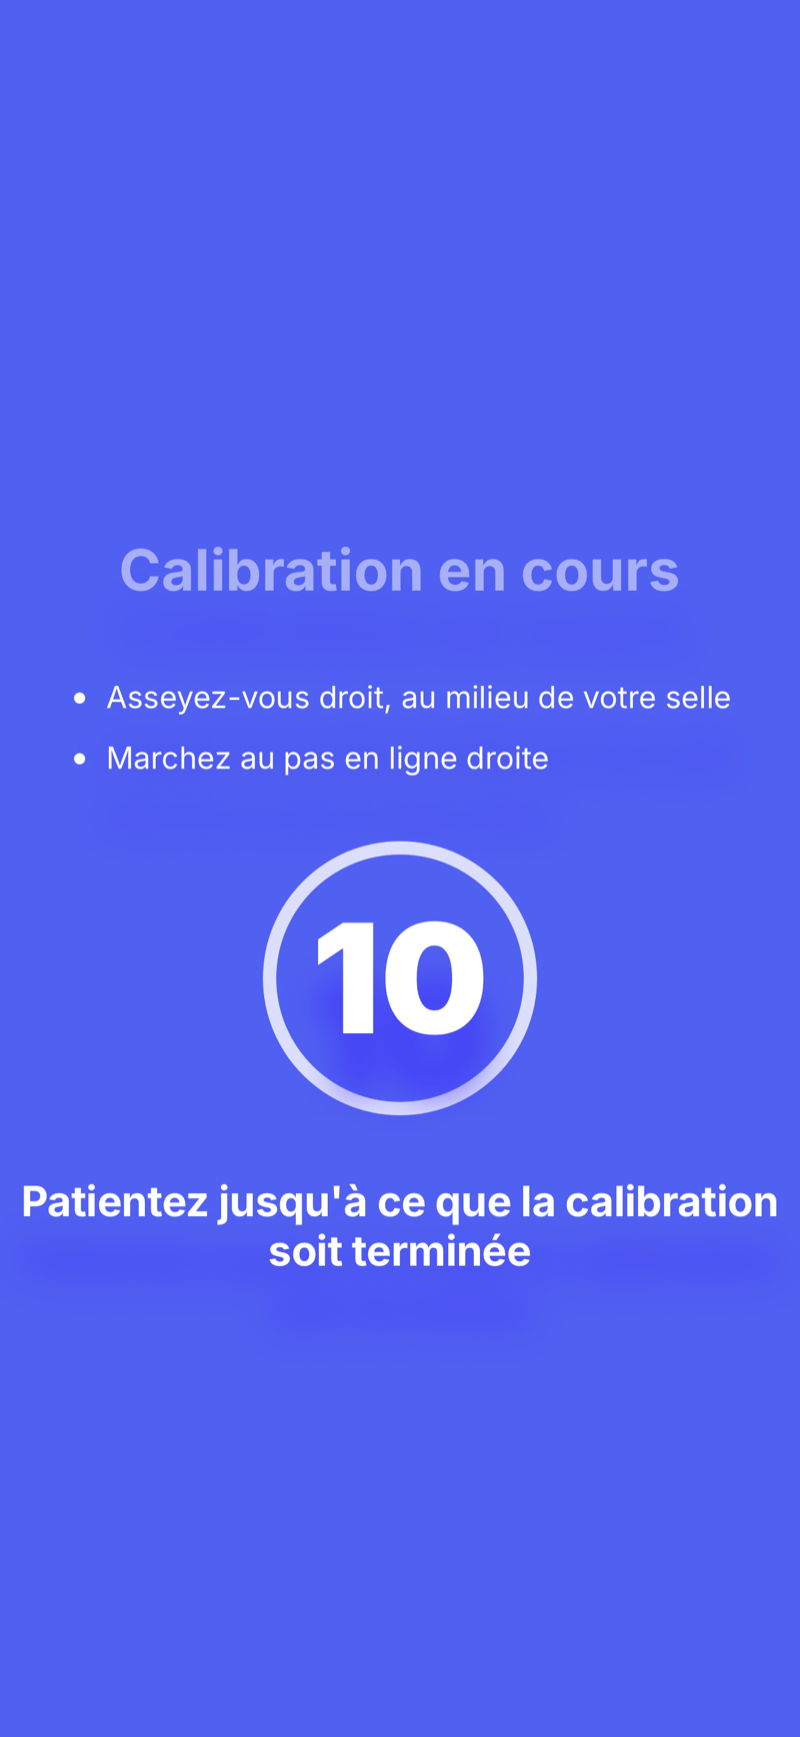
Each session is automatically calibrated during the first 10 seconds. We recommend walking in a straight line during the calibration.
- Retighten your girth evenly on both sides after calibration.
- If that is impossible, make sure your girth is ready for the calibration, before you start recording.
- If you have to open the girth to move the saddle, stop the recording before doing so, and start a new recording right after.
- Do not retighten your girth multiple times on one side only during a recording. Always do it on both sides.
If a session needs a manual recalibration, send an email to support@alogo-analysis.ch with your session ID.
The interface at a glance
The left menu is your home base; the main area lists your recorded sessions next to a calendar of sessions, events and notes.
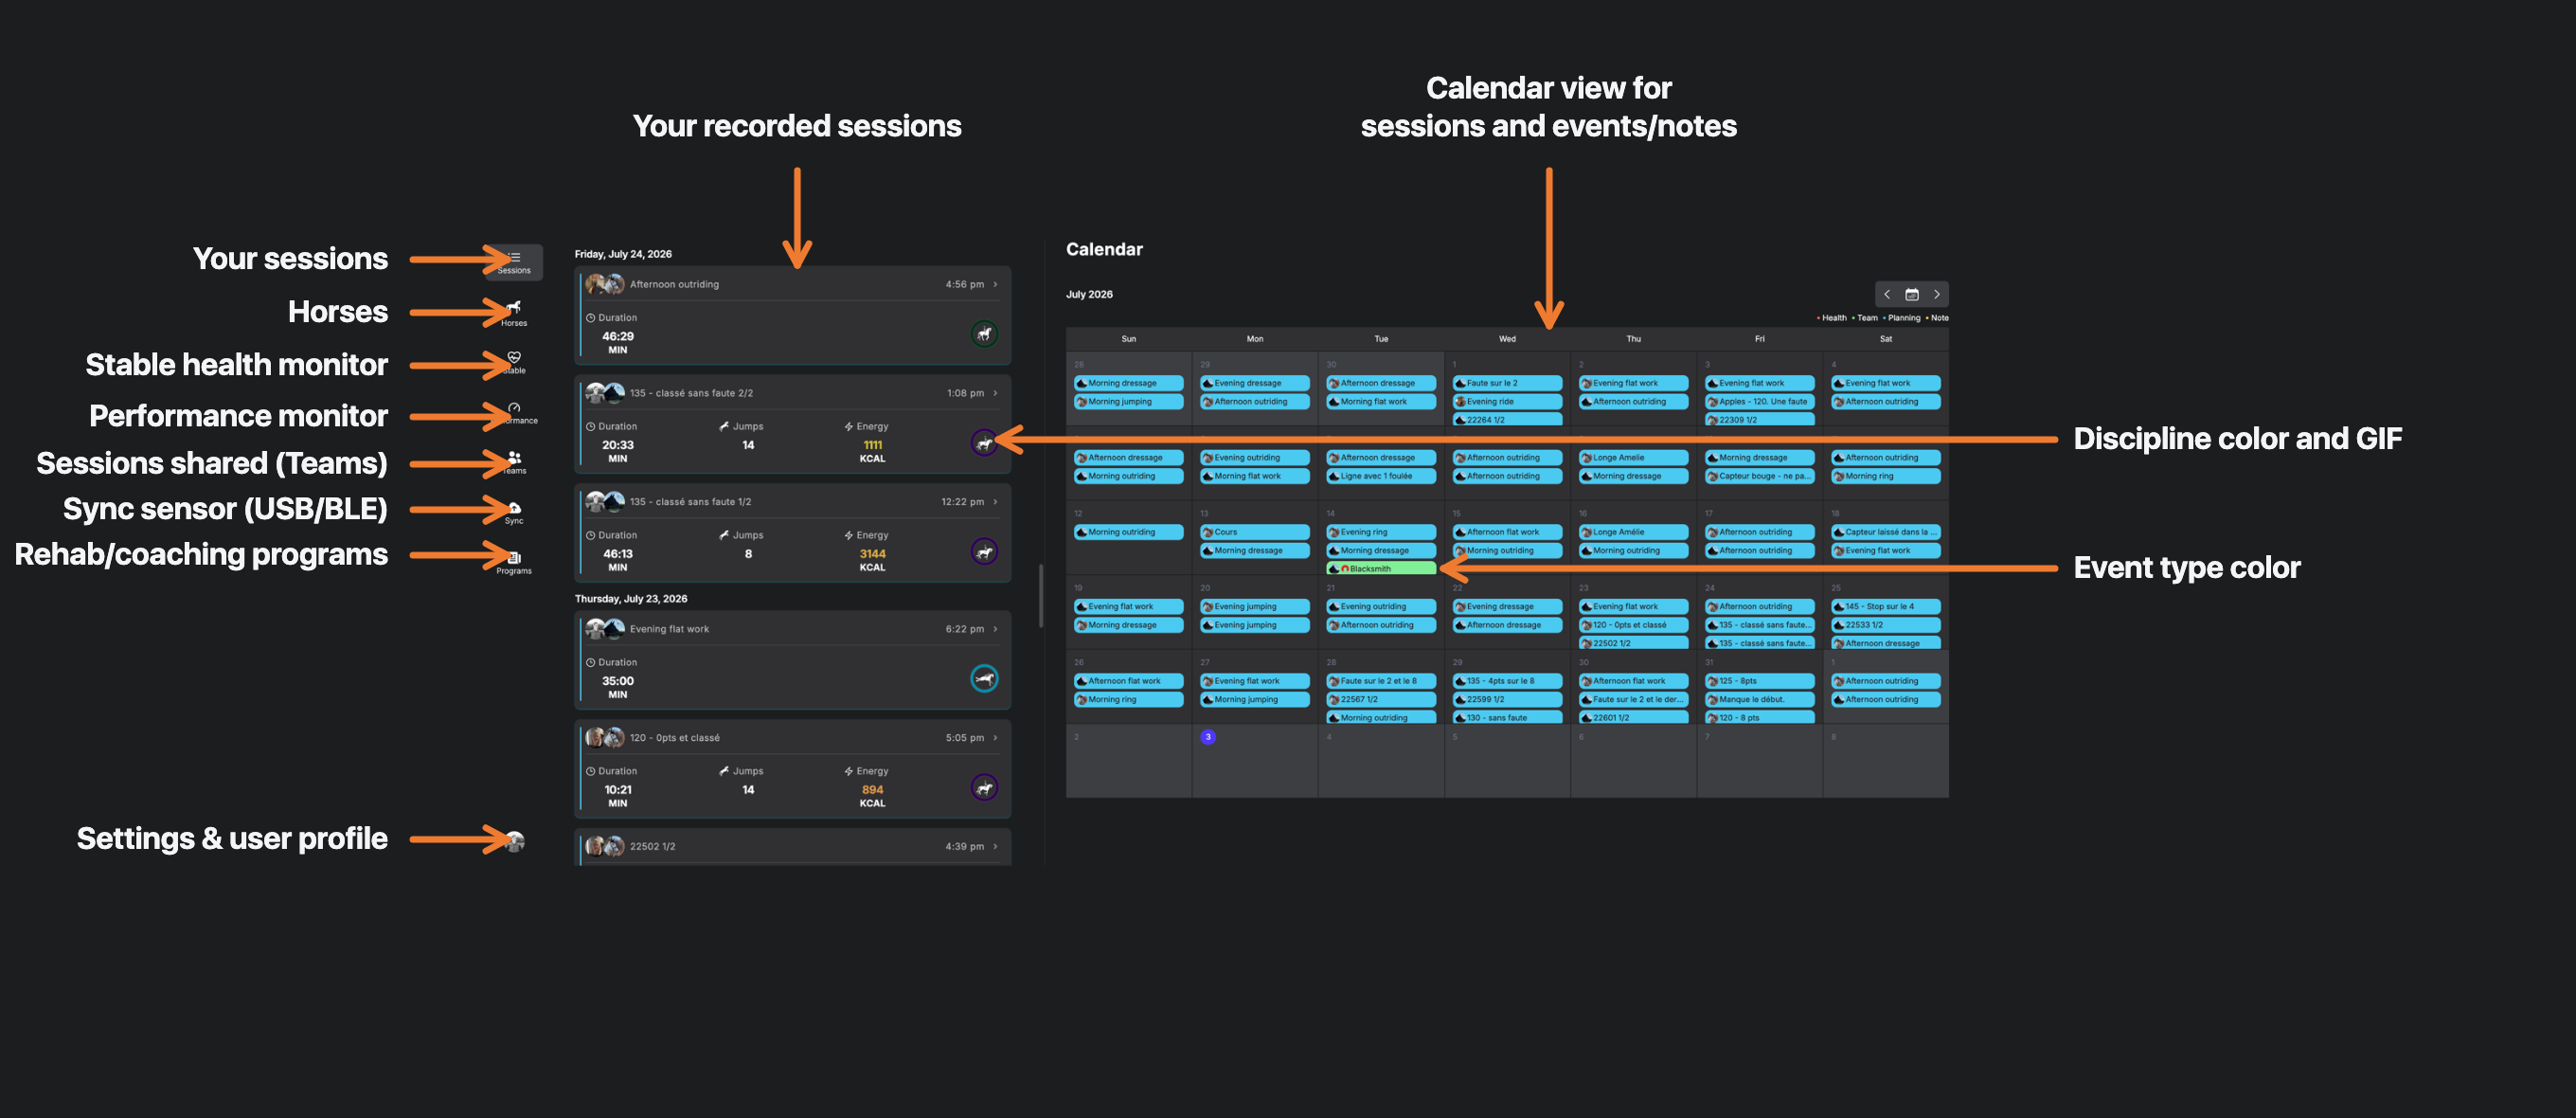
Sessions →
All your recorded sessions, with duration, distance and energy.
Compare →
Comparison tool for sessions (Expert profile · Alogo Premium).
Horses →
Your horses, their statistics and sharing options.
Stable →
Stable health monitor: all your horses’ health at a glance (Alogo Premium).
Performance →
Performance monitor: locomotion vitals vs each horse’s usual range (Alogo Premium).
Teams →
Sessions shared with your team members.
Sync →
Sync your sensor via USB or Bluetooth (BLE), step by step in the FAQ.
Programs →
Rehab & coaching programs.
Coaching →
Coaching dashboard (Coach profile).
Settings & profile →
Your avatar, bottom left: subscription, profile, settings, devices.
Working with sessions
To open a session, simply click on it in the list or in the calendar.
Reading the session listing
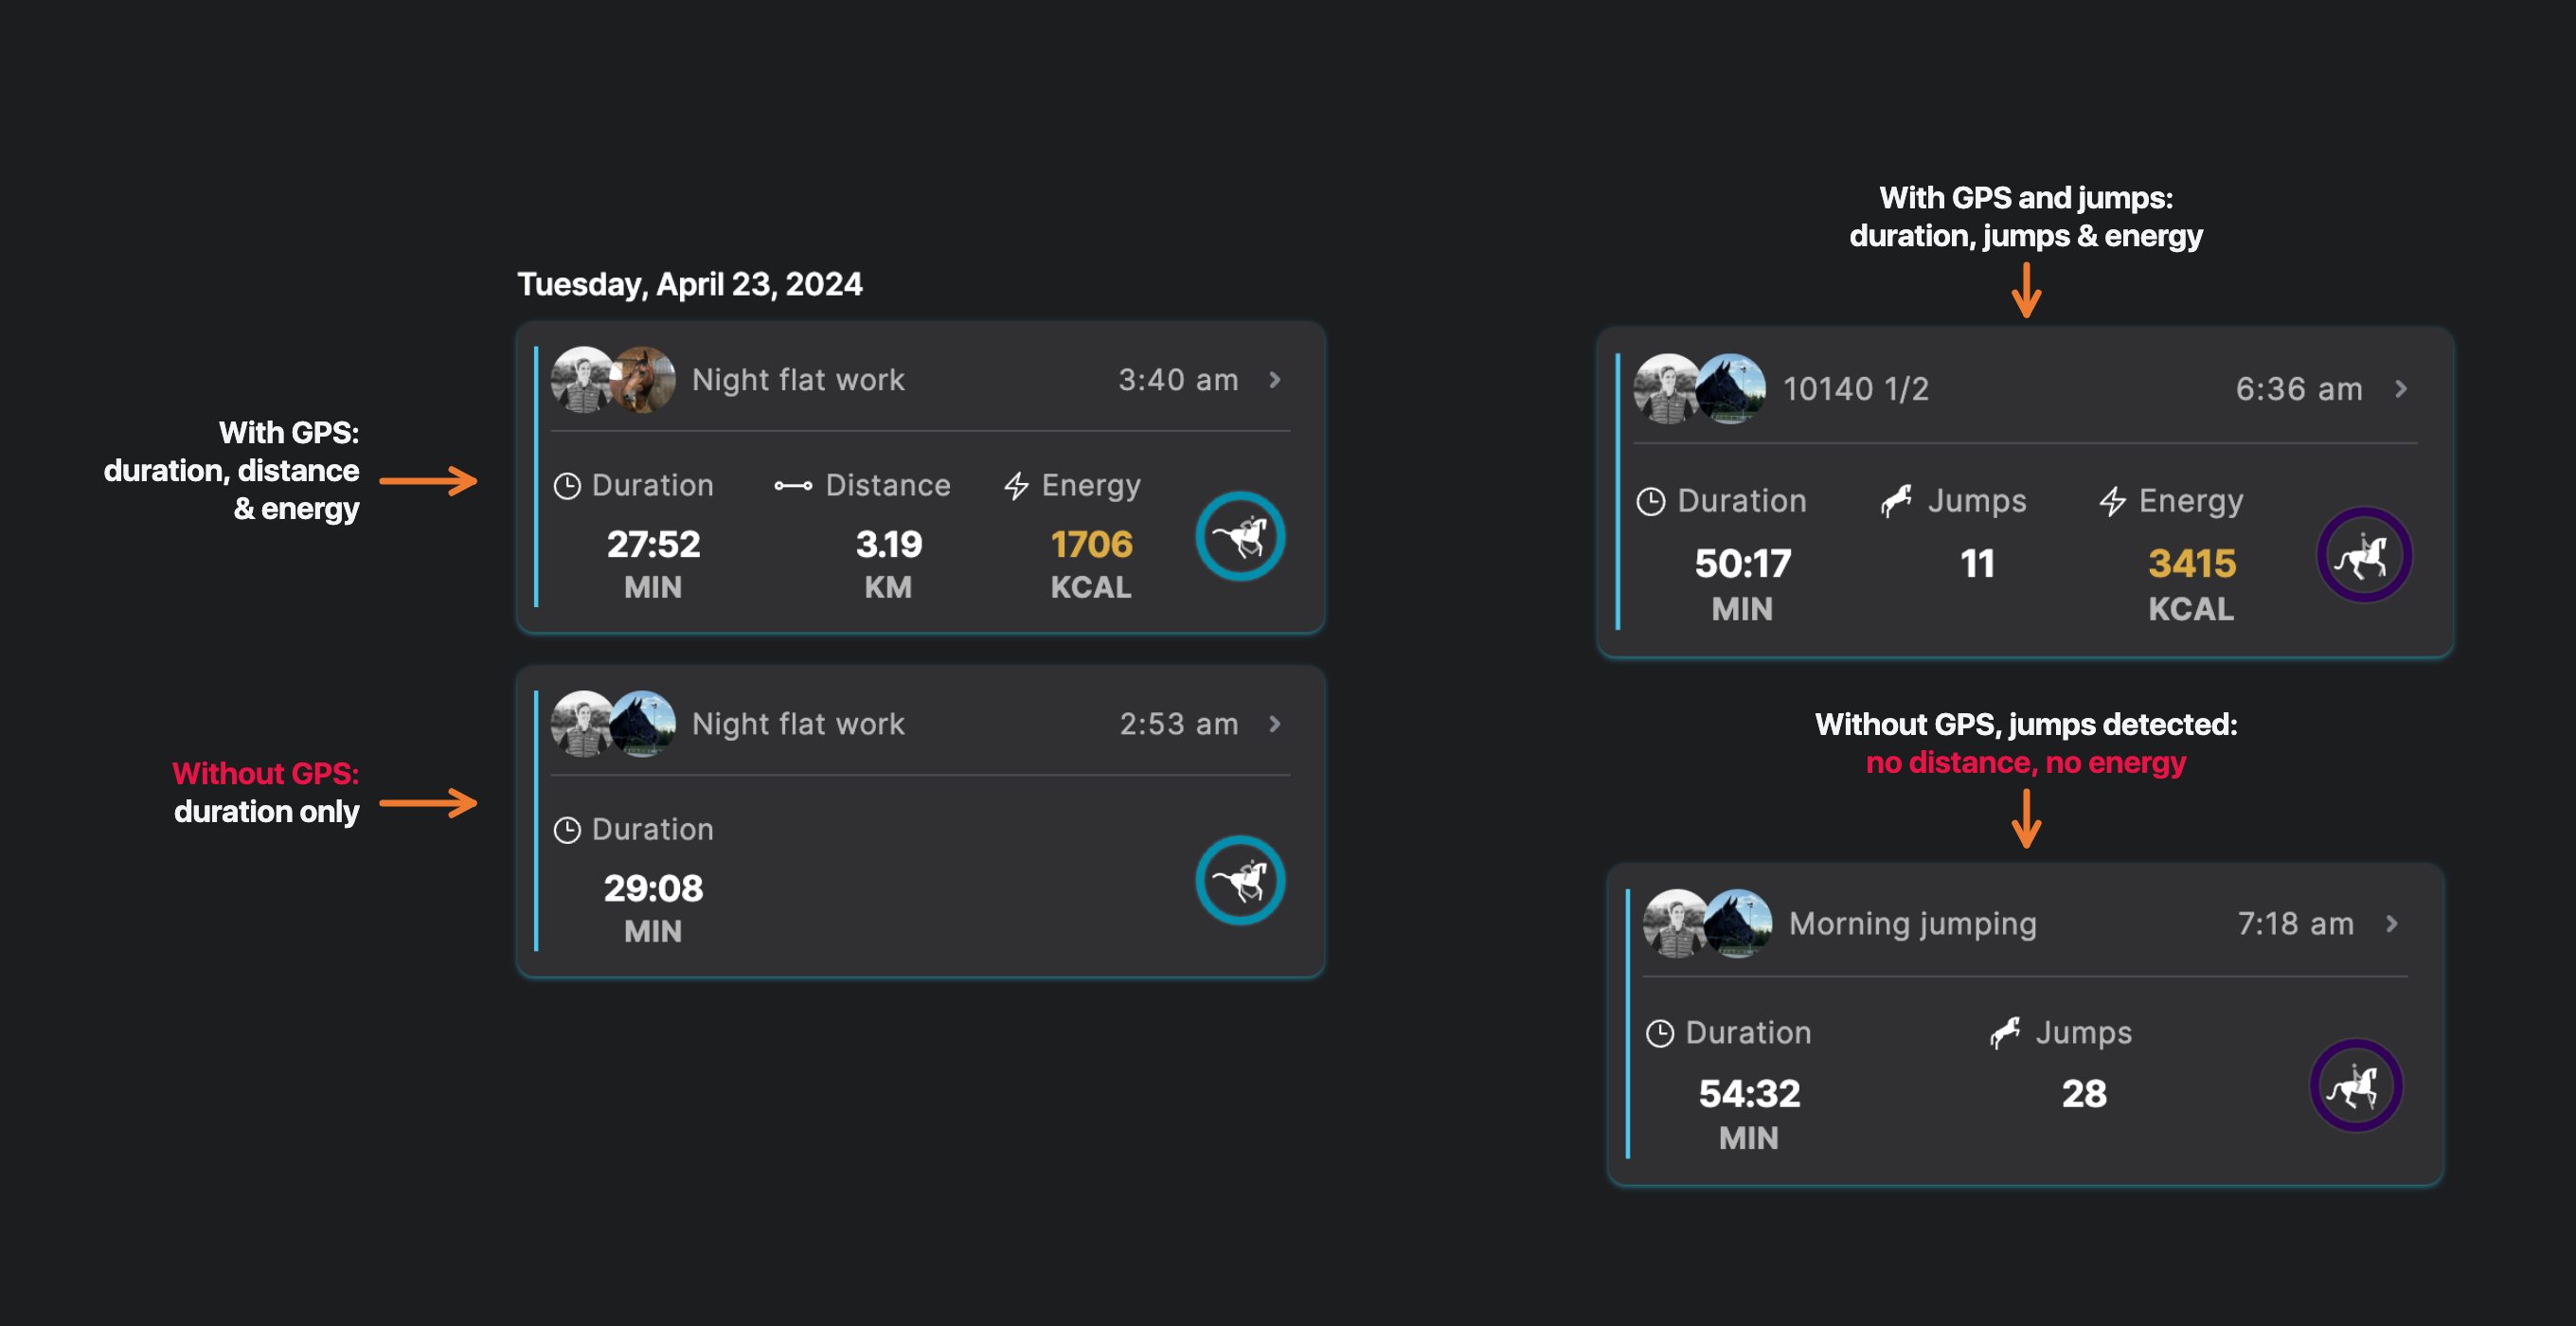
Each session card sums up what the recording contains: the discipline icon and colour, and the metrics available. What the card displays depends on the GPS signal and on detected jumps:
Find your session ID
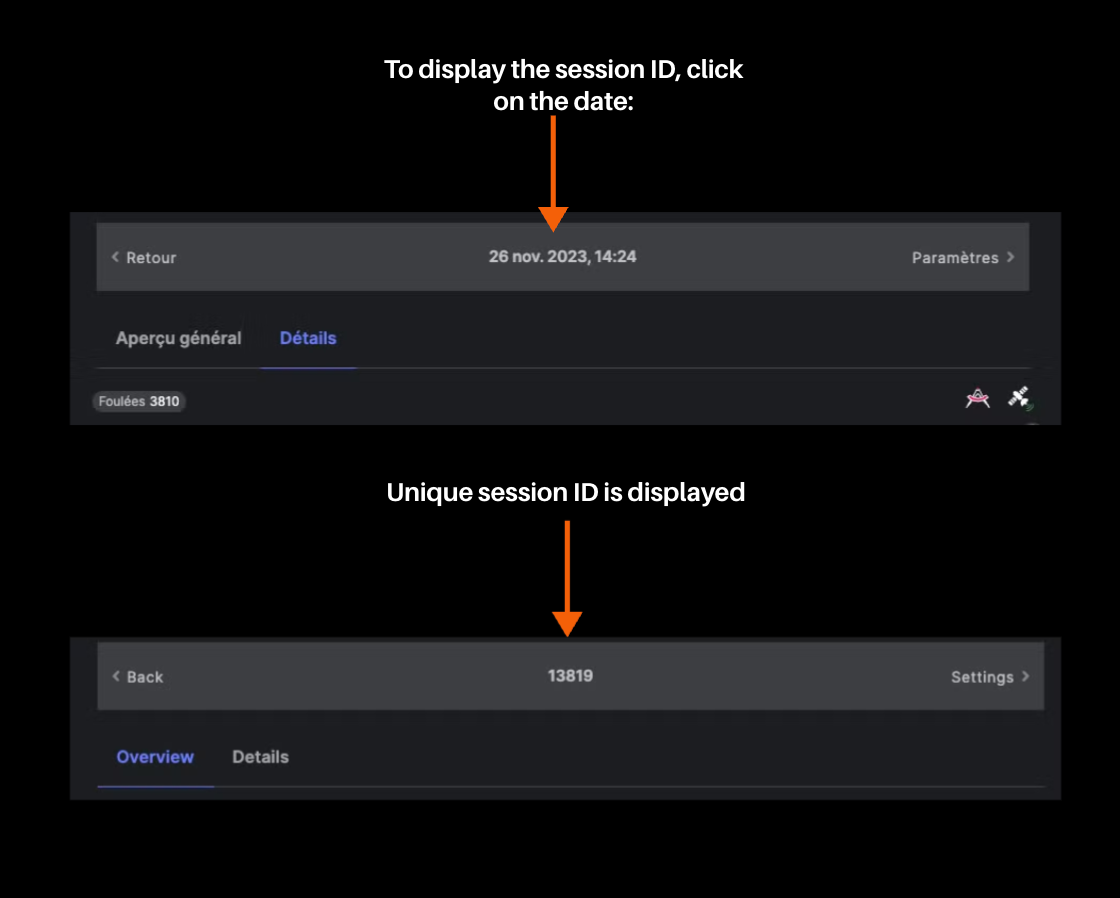
Inside a session, click on the date in the header. The unique session ID is displayed. You will need it for any support request.
Select what you analyse: the slider
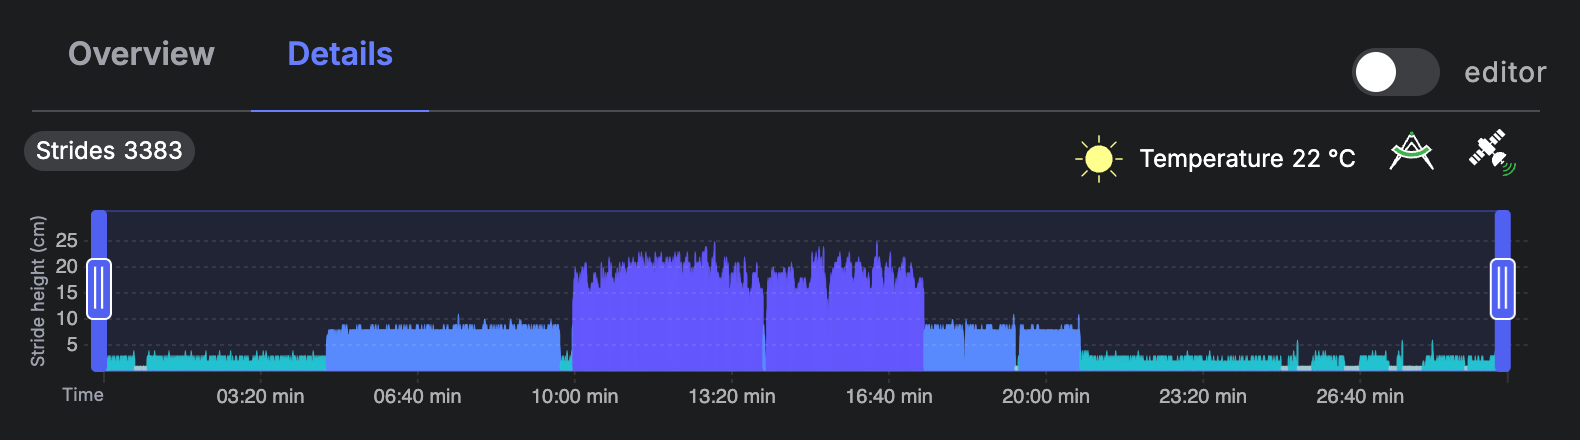
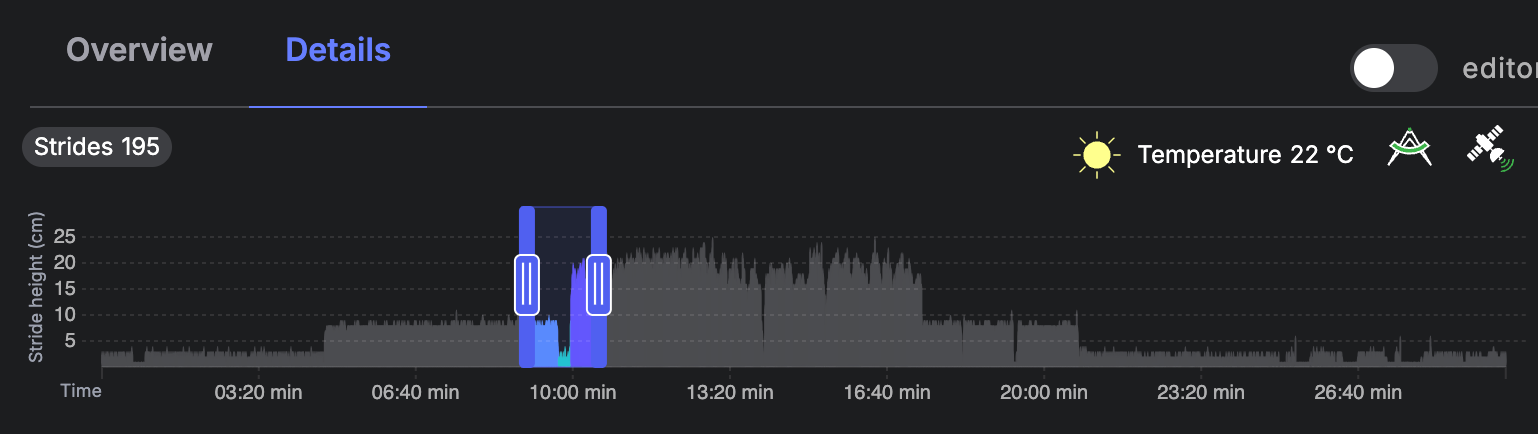
In the Details tab, the slider selects the portion of the session you want to analyse. By default, the whole session is selected.
- Drag the handles to change the selection.
- Double-click inside the selected range to zoom in.
- When you change the selection, all the data below is updated.

GPS: why it matters
Check the GPS status of any session with the satellite icon in the session header.
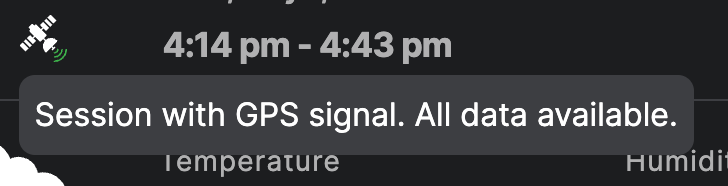
Sessions recorded without a good GPS signal have:
- No speed
- No distance
- No lengths (jumps / strides)
- No energy consumption
- No path mapping
If the Alogo doesn’t acquire a GPS signal, the date and time of the recording are not saved: the date and time of the sync are used instead, unless the Alogo is synced with the same smartphone that started and stopped the session.
Calibration, in depth
The calibration corrects the sensor’s placement, especially if you use a special girth, a martingale, or if the girth is not tightened equally on both sides. The process removes the horse’s natural imbalance from the measurements.
How the automatic calibration works
- The horse needs to walk in a straight line for the session to calibrate automatically.
- We subtract the difference measured over the first 10 seconds of the recording. For example, if the roll angle indicates +2° (right), −2° is applied to every roll value, same for pitch and yaw.
- The automatic calibration can be removed upon request: just contact us.

What can influence the calibration
- The girth was not tightened equally after the calibration.
- The ground was not horizontal during the calibration.
- The calibration was done at a standstill, or at a walk that wasn’t in a straight line.
- A change in the rider’s position.
Upon request, Alogo can manually calibrate anywhere in the session, or remove the calibration altogether. Email support@alogo-analysis.ch with your session ID.
Regular vs Expert profile
Click your avatar (bottom left) → Settings → Profile, and switch between Regular and Expert, then update your profile.
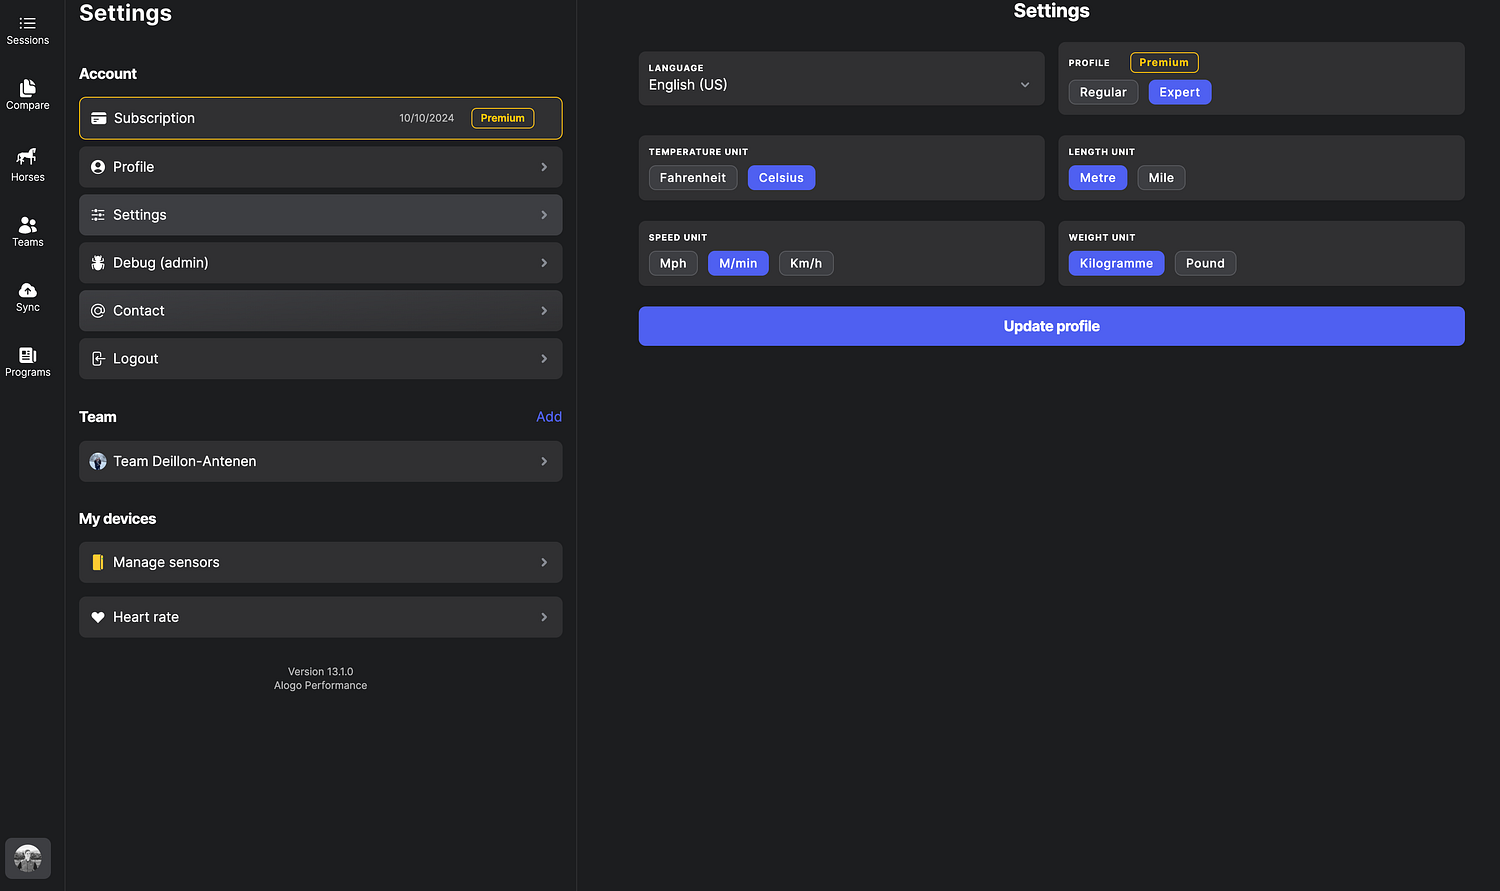
The Expert profile is part of Alogo Premium and gives you access to:
- The “Compare” menu
- Stride-by-stride analysis (table) in a session
- Jump-by-jump analysis (table) in a session
- Export features
- Anomaly detection per stride
Clock time for the analysis
Under Settings, the Time display switch toggles between Time (elapsed since the start of the recording) and Clock time (the real time of day). With Clock time, every stride and jump is read against the clock, handy to identify the exact moment something happened, e.g. “the jump at 4:14 pm”.
Access & rights
An Alogo user can be, at the same time:
| You are… | Which means |
|---|---|
| Owner of a session | You synced it. You can edit the session: for example assign the rider and the horse. |
| Owner of a horse | You created it. You see every session and event that horse is assigned to. |
| Rider of a session | You only see the sessions you have been assigned to as a rider. |
A horse can be assigned to a session. Its owner then sees that session too.
Horses: create & share
Create a horse
- Open the Horses menu and click Add.
- Fill in the profile: the only mandatory field is the horse name.
- Save. As the creator, you become the owner of that horse and will see every session and event it is assigned to.
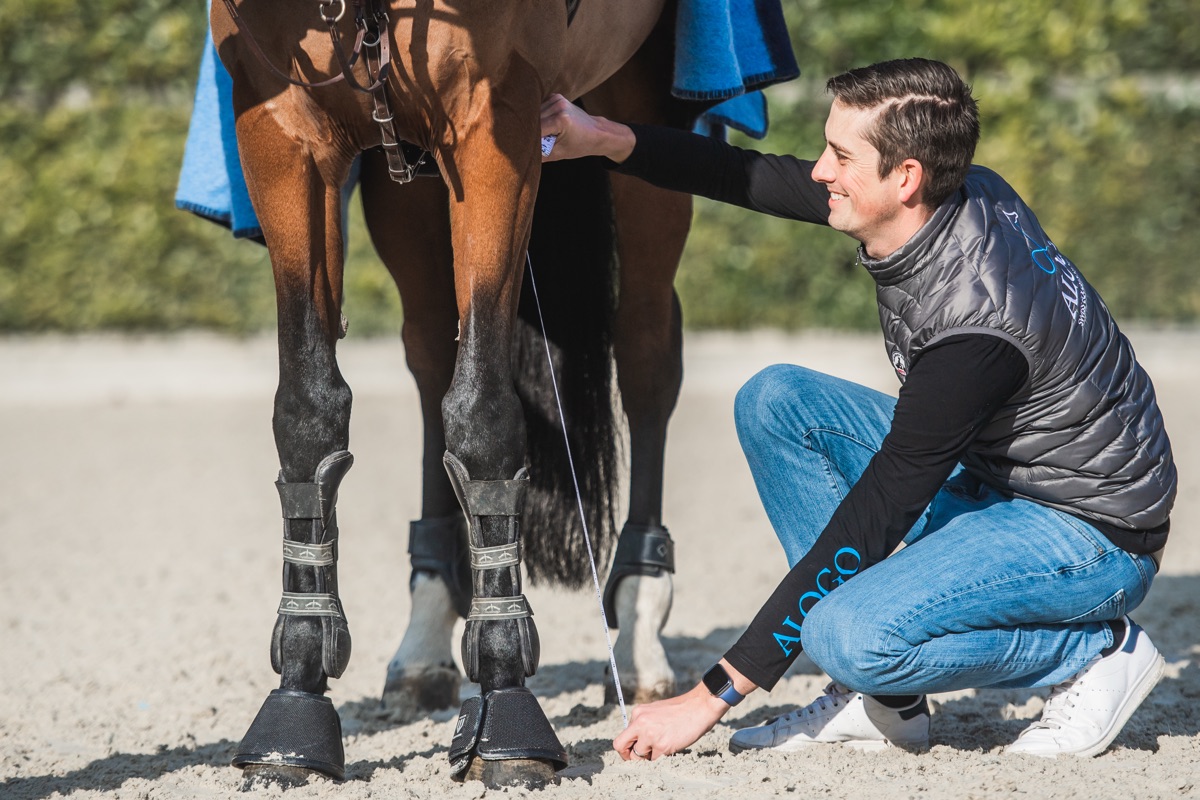
Sensor height: remember that this value directly impacts the measured height of the jumps.
Share a horse
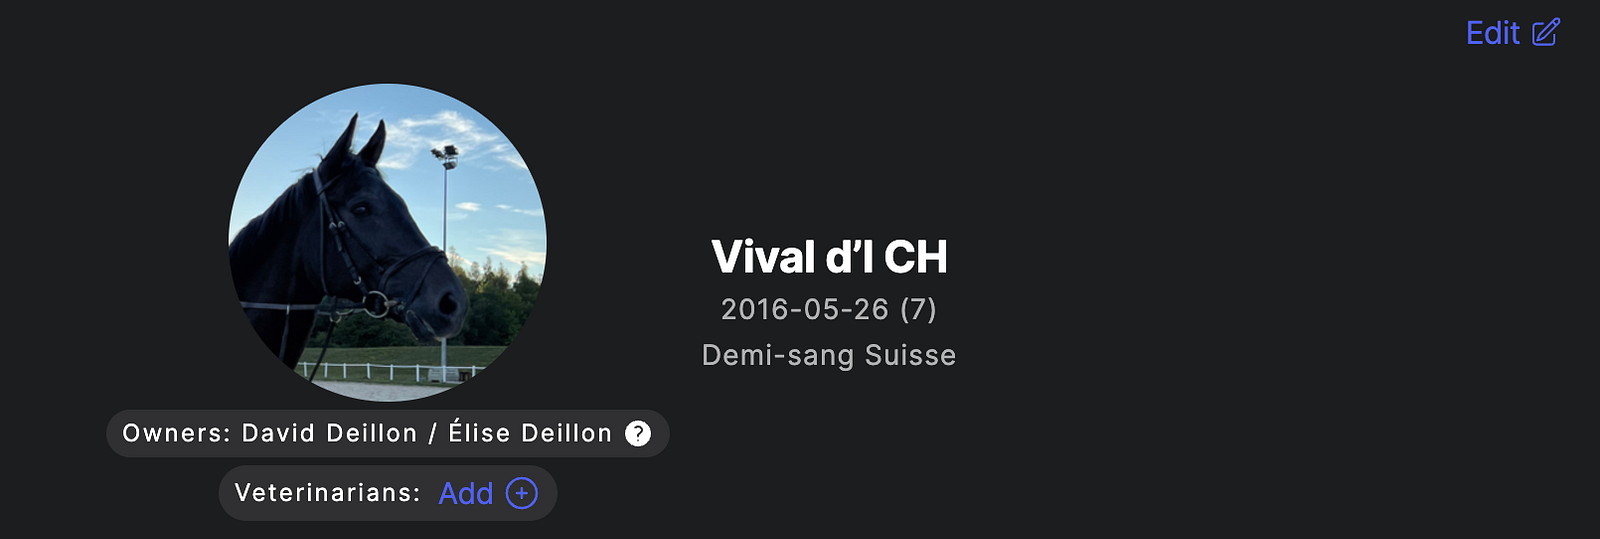
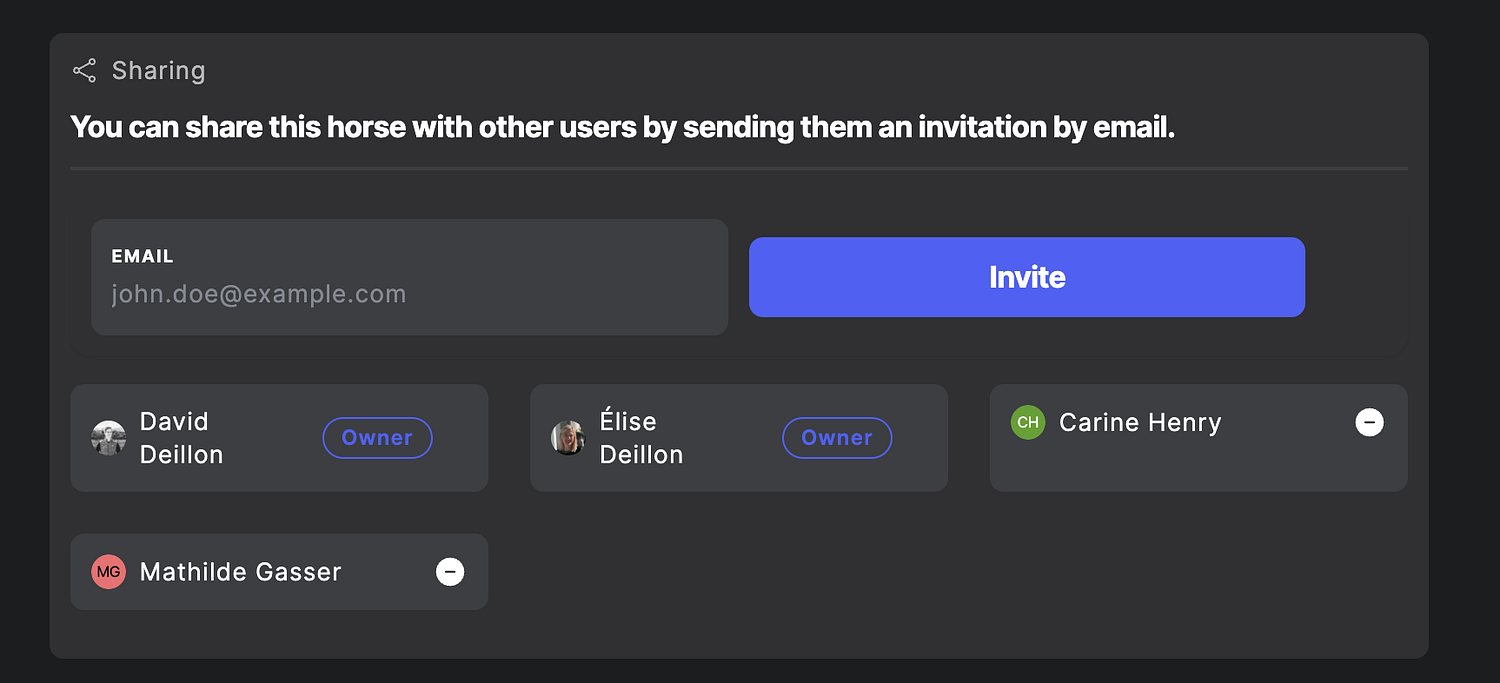
Open the horse and click Edit: the Sharing block is at the very bottom. Invite a person by email: the person must 1) create an Alogo account and 2) accept the invitation received by email.
Teams
Creating a team is important to assign a rider to a session and to share sessions individually with your team members.
Create a team & invite riders
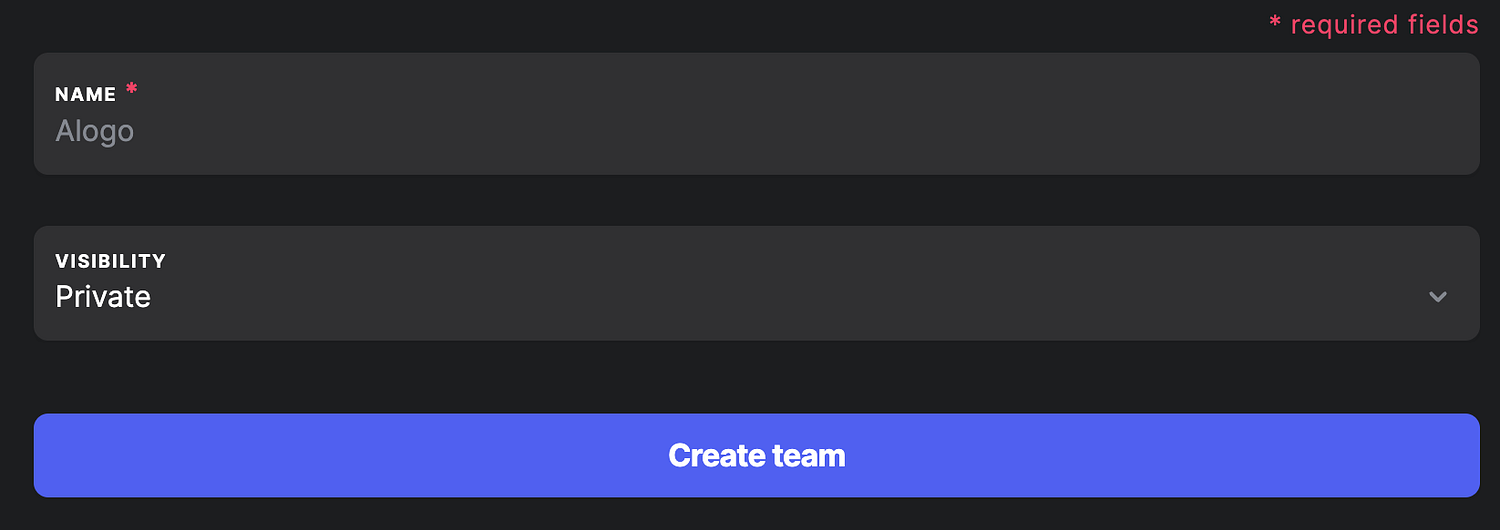
- Open Settings (your avatar) → Team → Add.
- Name the team and create it. (The visibility setting has no effect yet. Leave it as is.)
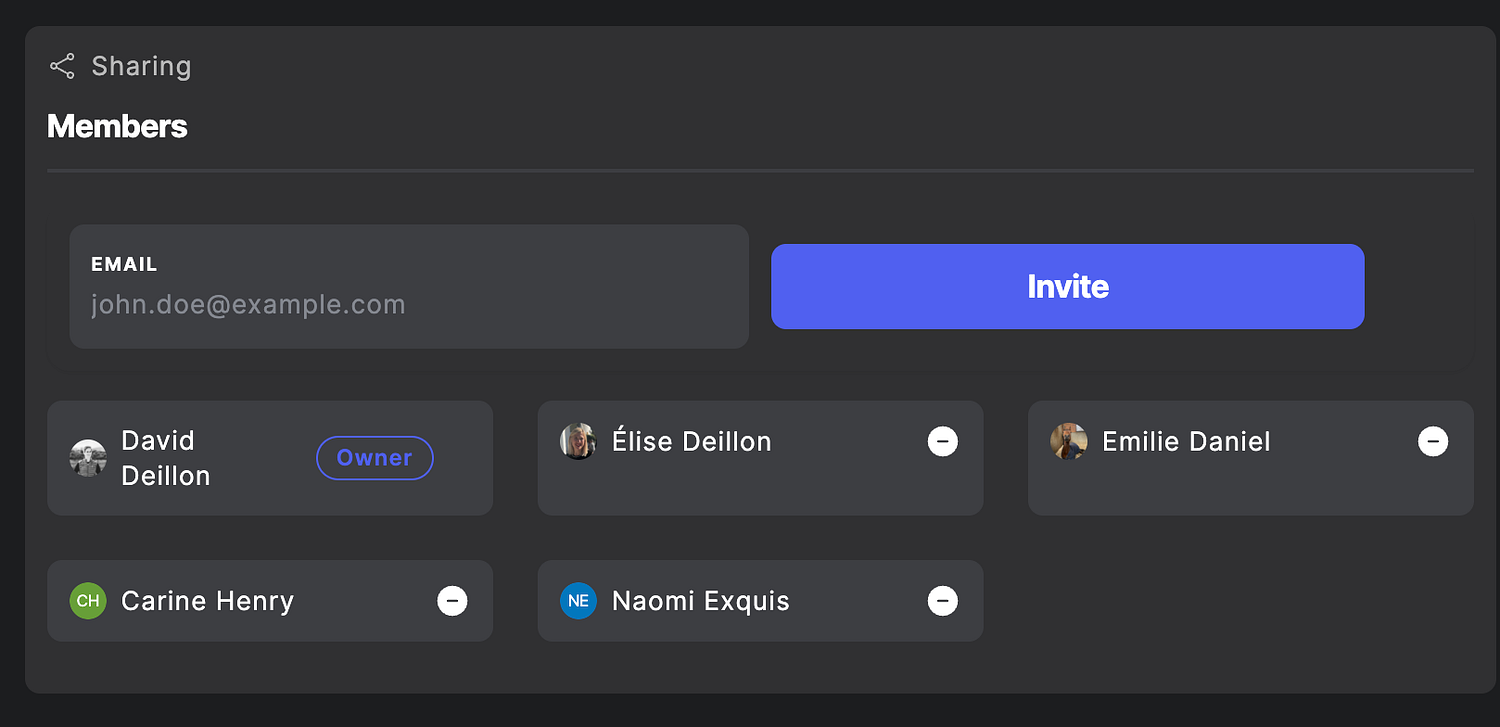
- Invite each rider by email. Each rider must create an Alogo account and accept the invitation received by email.
Share a session with the team
- Open the session and click Settings (top right).
- Under Team sharing, select Shared and save.

Access the team’s shared sessions
Open the Teams menu: the sessions shared by you or your team members are displayed there.
Anomaly detection
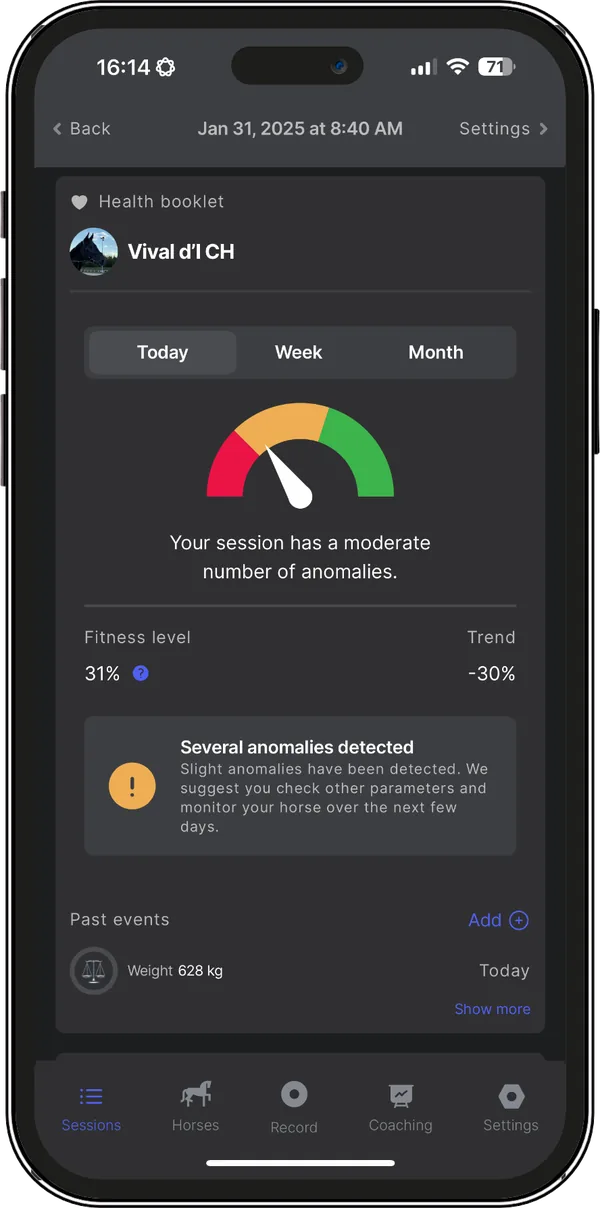
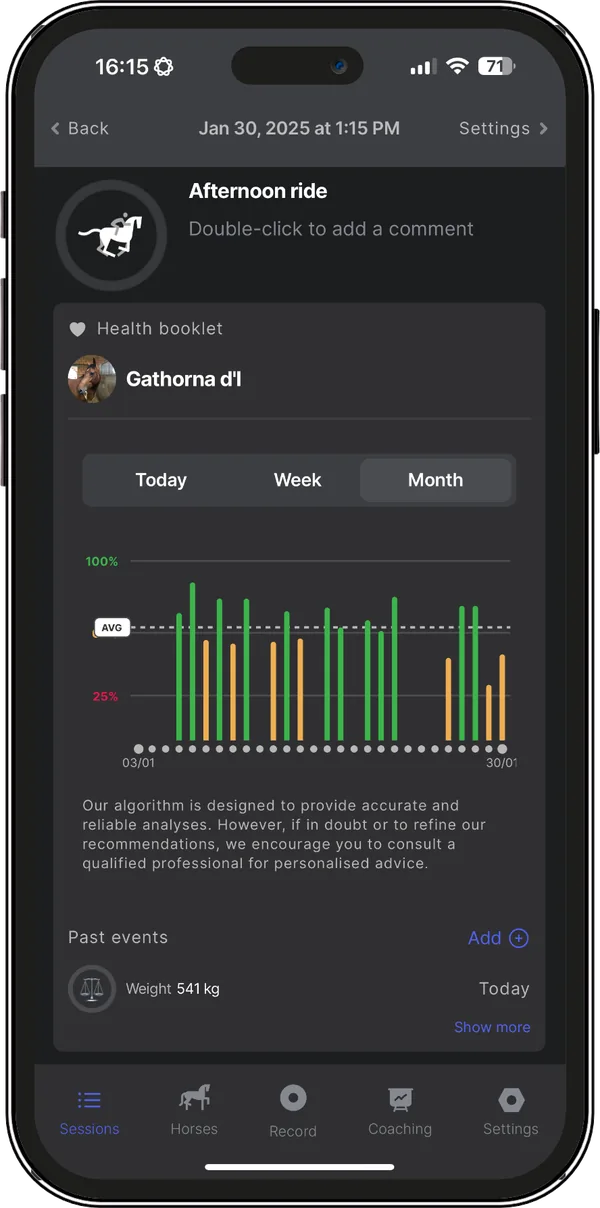
Alogo analyses each stride and flags locomotion anomalies early, so you can act in time. The detection uses the roll, pitch, accelerations, power and Z displacement of every stride.
Reading the scores
| Anomaly score | Health indication |
|---|---|
| 0 – 40 | 100% – 60%: no injuries |
| 41 – 75 | 59% – 25%: warnings |
| 76 – 100 | 24% – 0%: injured |
What can influence the score
- Type of training (e.g. outriding)
- A horse that is too excited, or its fatigue
- Change of rider, or horse-specific and unusual behaviour/movement
- Ground (up/downhill)
- Calibration of the sensor, or uneven sensor placement
Alogo does not make a diagnosis: it detects a locomotion anomaly early to help you act in time. Any diagnosis always remains with your vet.
Stable health monitor
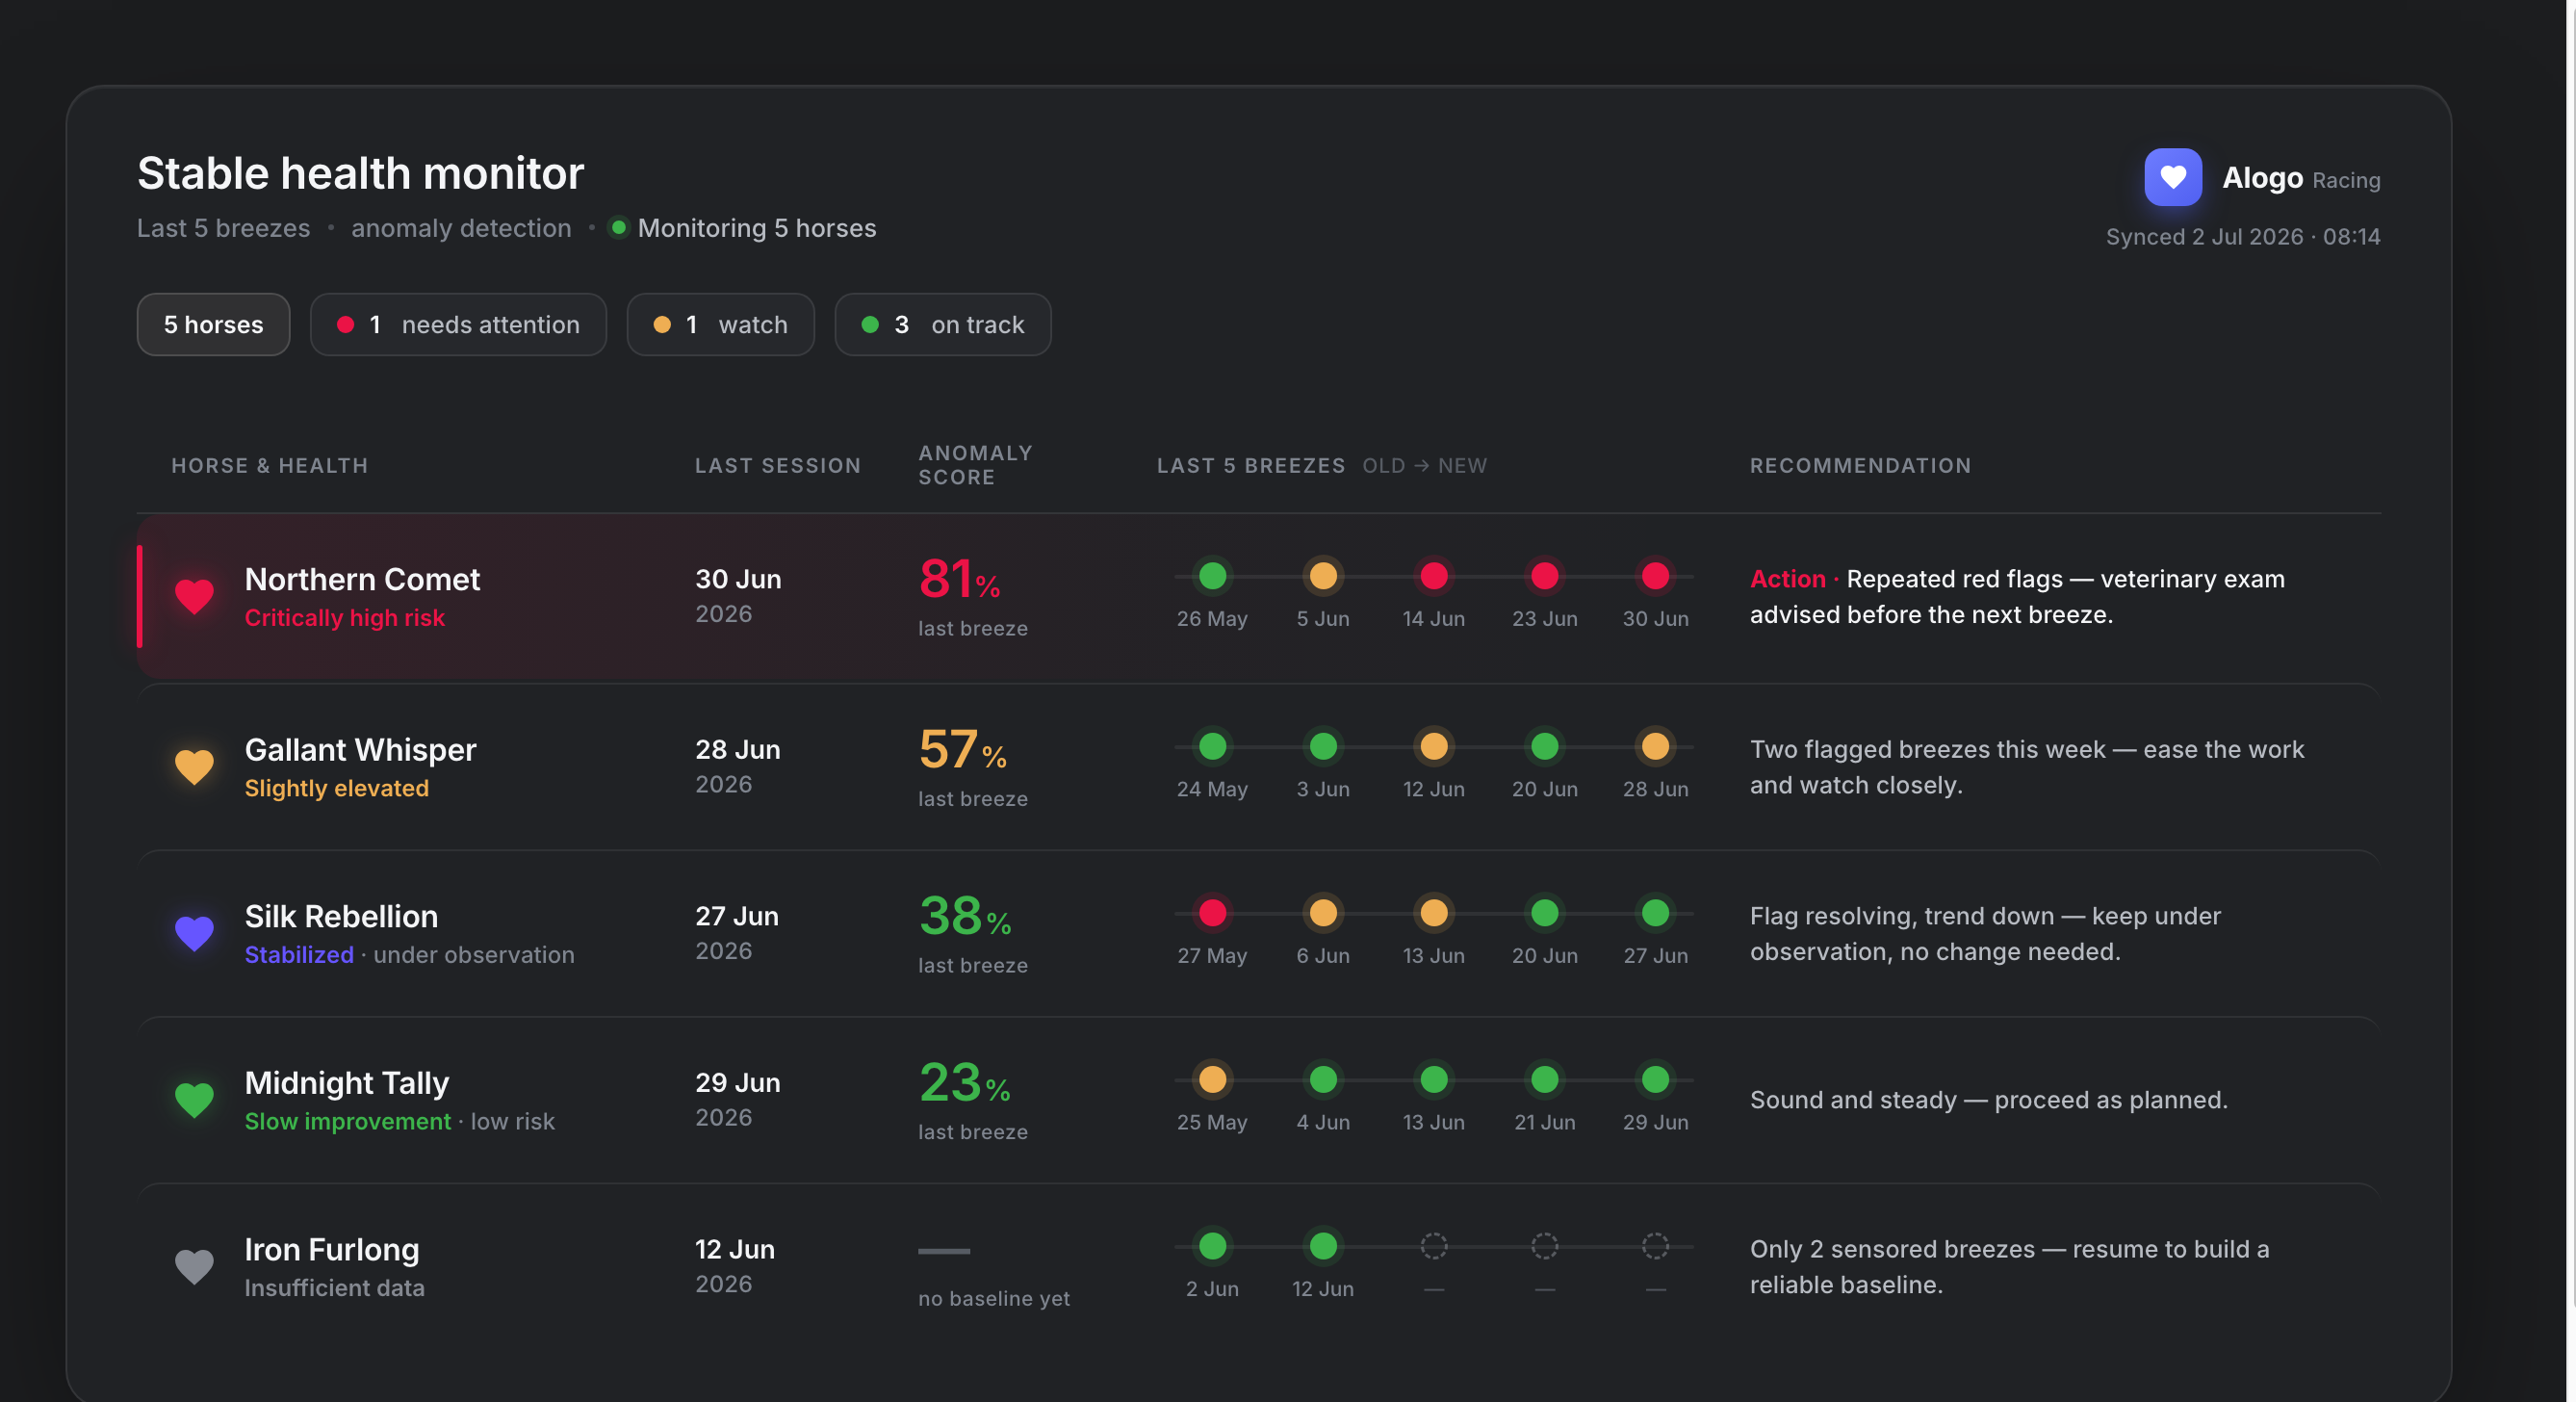
The Stable menu shows all your horses’ health at a glance, powered by anomaly detection. No need to open every session. On the mobile app, it is the Stable tab; the Health ↔ Performance switcher at the top toggles between the two monitors.
Reading the board
- The chips at the top recap all your horses. Click one to filter the board by status.
- Your primary horse is always listed first.
| Status | Which means |
|---|---|
| On track | Recent sessions are clean: proceed as planned. |
| Watch | Flagged session(s) this week: ease the work and watch closely. |
| Needs attention | Repeated red flags: a veterinary exam is advised. |
| Insufficient data | Too few sensored sessions: keep recording to build a reliable baseline. |
Stables & Sync Box
Horses are grouped by stable. Assign a stable directly from the horse row. When a stable is equipped with an Alogo Sync Box, its status (Live / Offline, uploads today) is displayed so you know the data keeps flowing. Not equipped yet? You can request a Sync Box directly from the board.
As with anomaly detection, the monitor flags early signs so you can act in time. The diagnosis always remains with your vet.
Performance monitor
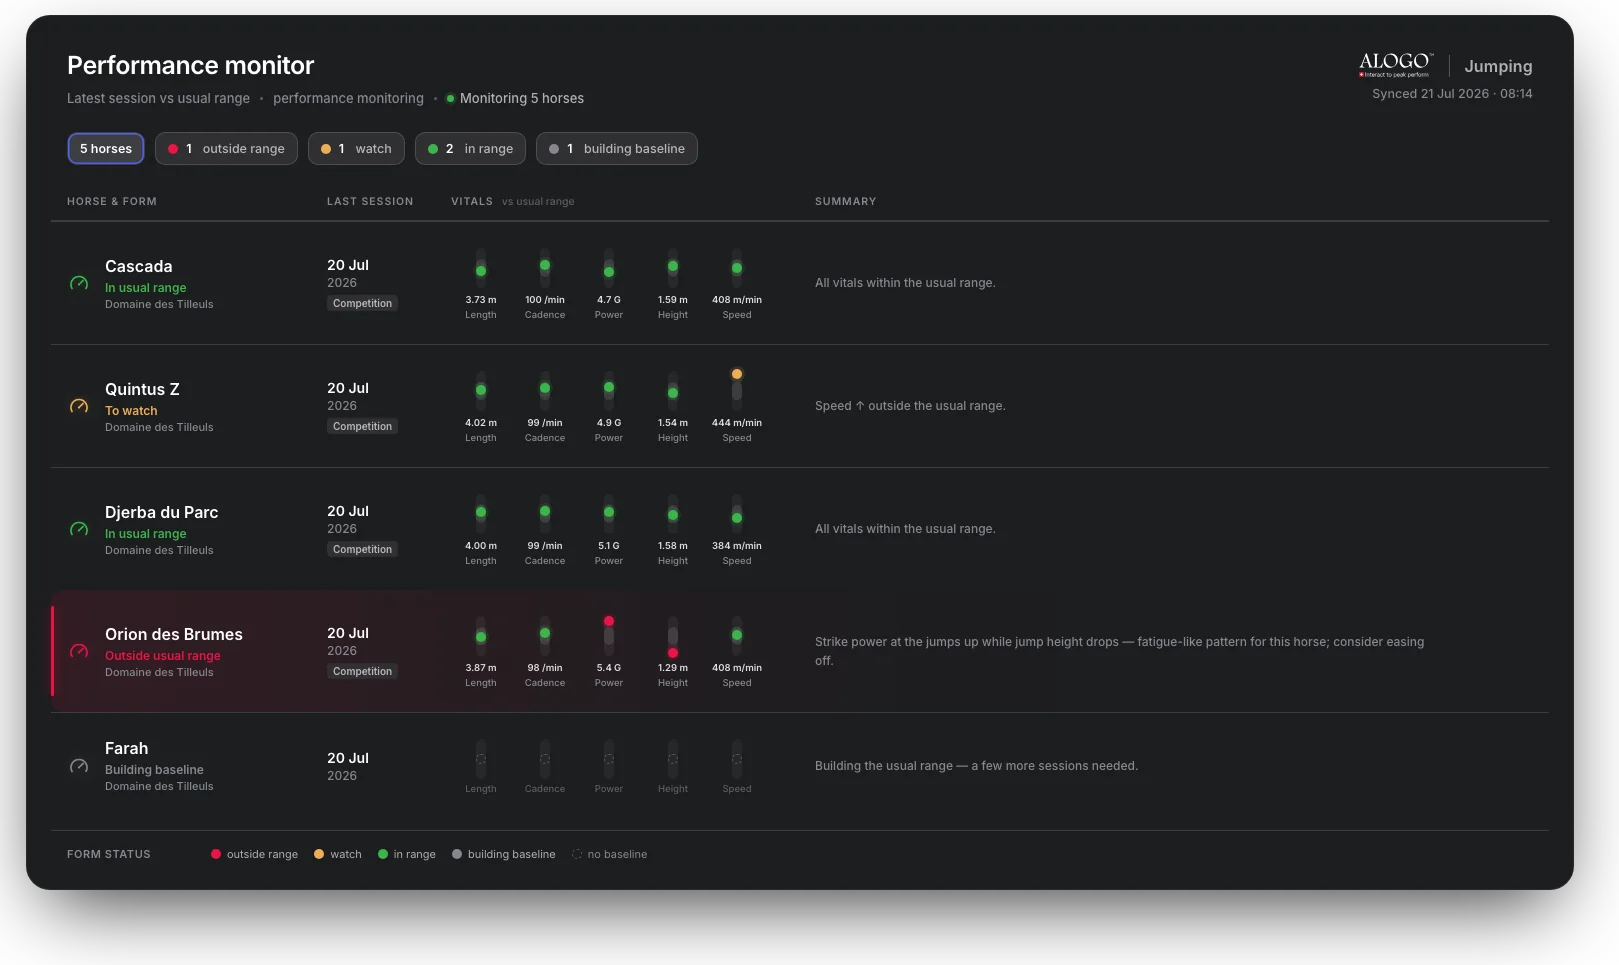
The Performance menu tracks each horse’s locomotion vitals against its own usual range, not absolute thresholds. The latest activity is compared with what is normal for that horse, so even a subtle change shows up early. Open it from the sidebar, or with the Health ↔ Performance switcher on the Stable health monitor.
The vitals
The vital set depends on the discipline and is measured at a reference gait (shown on the board):
| Discipline | Vitals, in display order |
|---|---|
| Jumping | Stride length · Cadence · Strike power at the jumps · Jump height · Speed |
| Racing & others | Stride length · Cadence · Stride height · Speed |
Reading the board
- Each vital is a pill: the latest value against the horse’s usual range (green within range, an orange dot when it drifts above or below). Click a pill for the drill-down chart: recent sessions plotted over the shaded usual range, with the number of sessions that built the range.
- One vital out of range puts the horse on watch (orange); two or more at once escalate to outside range (red).
- Building baseline (grey): a few more sessions are needed before the usual range is reliable.
- Racing yards get racing vocabulary: latest breeze, last breezes.
Fatigue pattern (jumping): strike power at the jumps up while jump height drops reads as a fatigue-like pattern for that horse. The summary then suggests easing off. A pattern to consider, never a diagnosis.
Events & health book
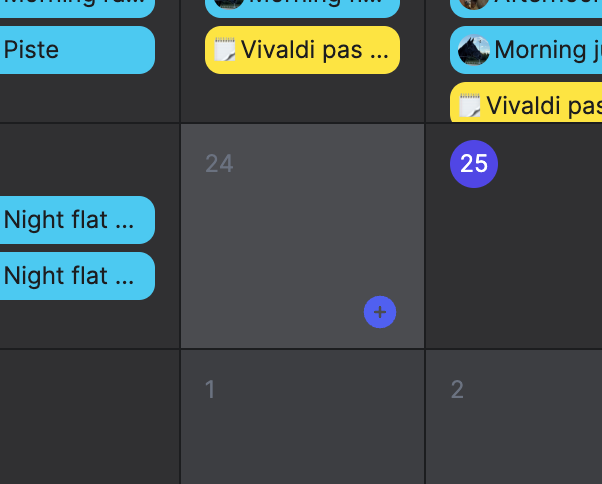
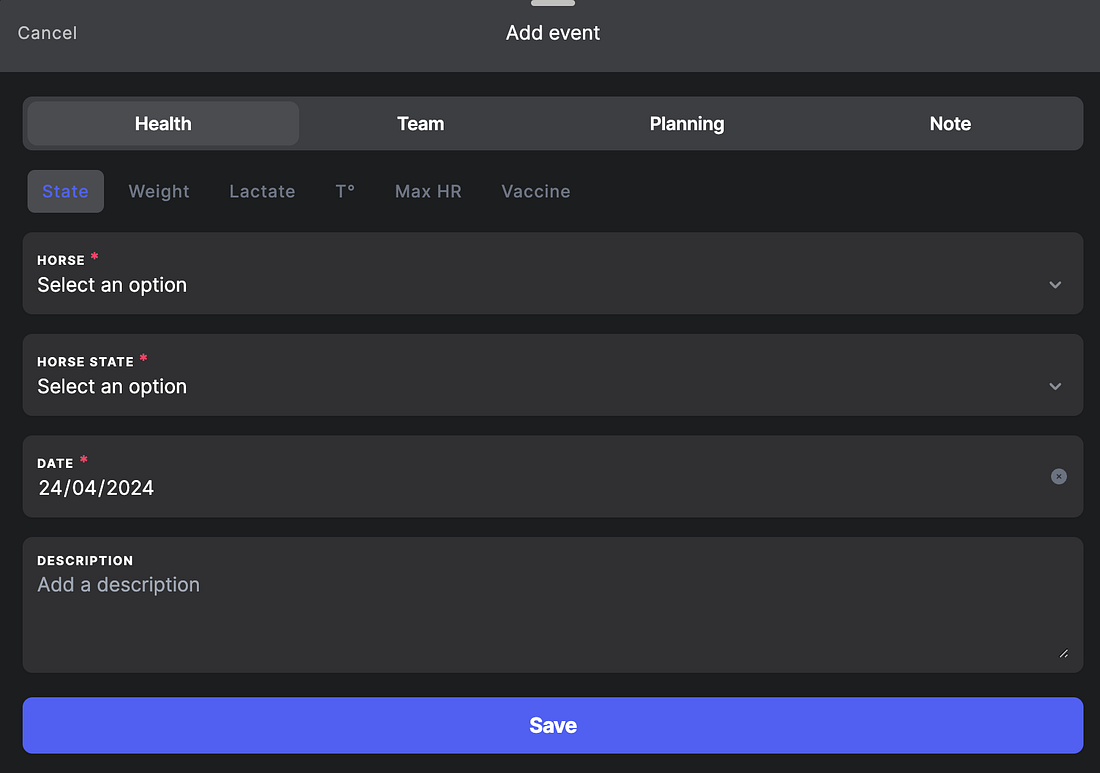
- Click on a date in the calendar, or on the +.
- Choose the event type and its sub-menu (vet, farrier, vaccine, competition…).
- The event is displayed in the session’s health book section and in the calendar view.
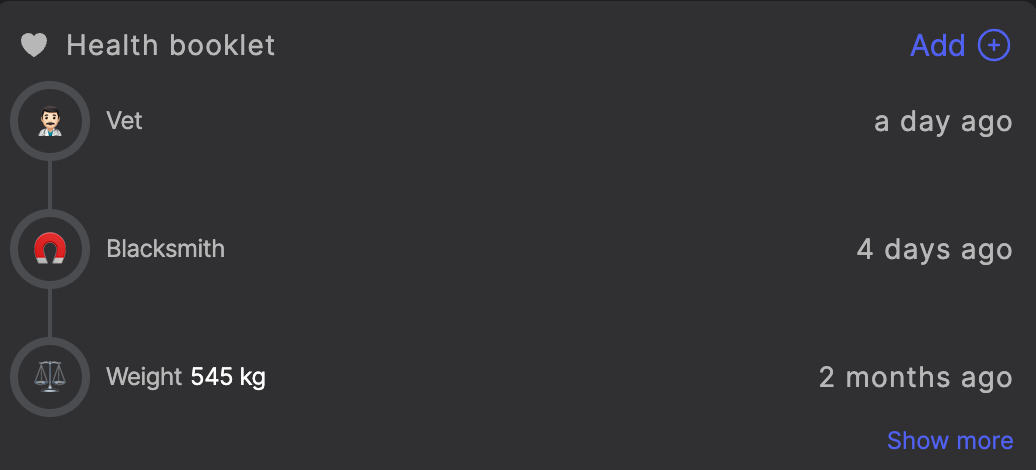
The weights of the horse and the rider are used to calculate the energy consumption. Set the rider’s weight under Settings → Profile.
Coaching dashboard
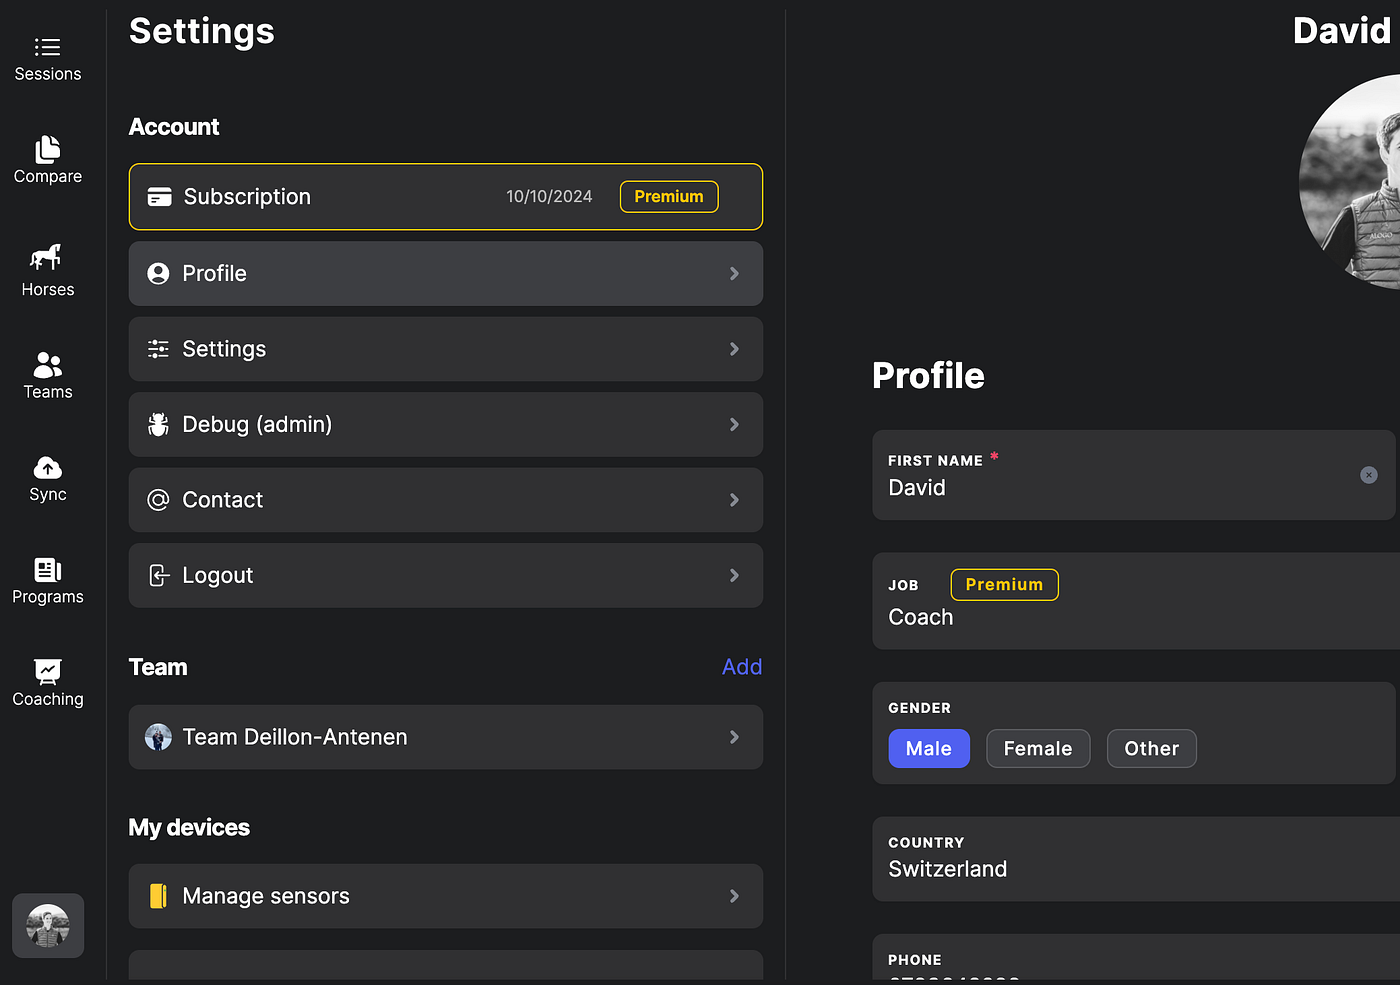
- Open Settings → Profile.
- Select Coach and update your profile.
- A new Coaching menu appears in the sidebar.
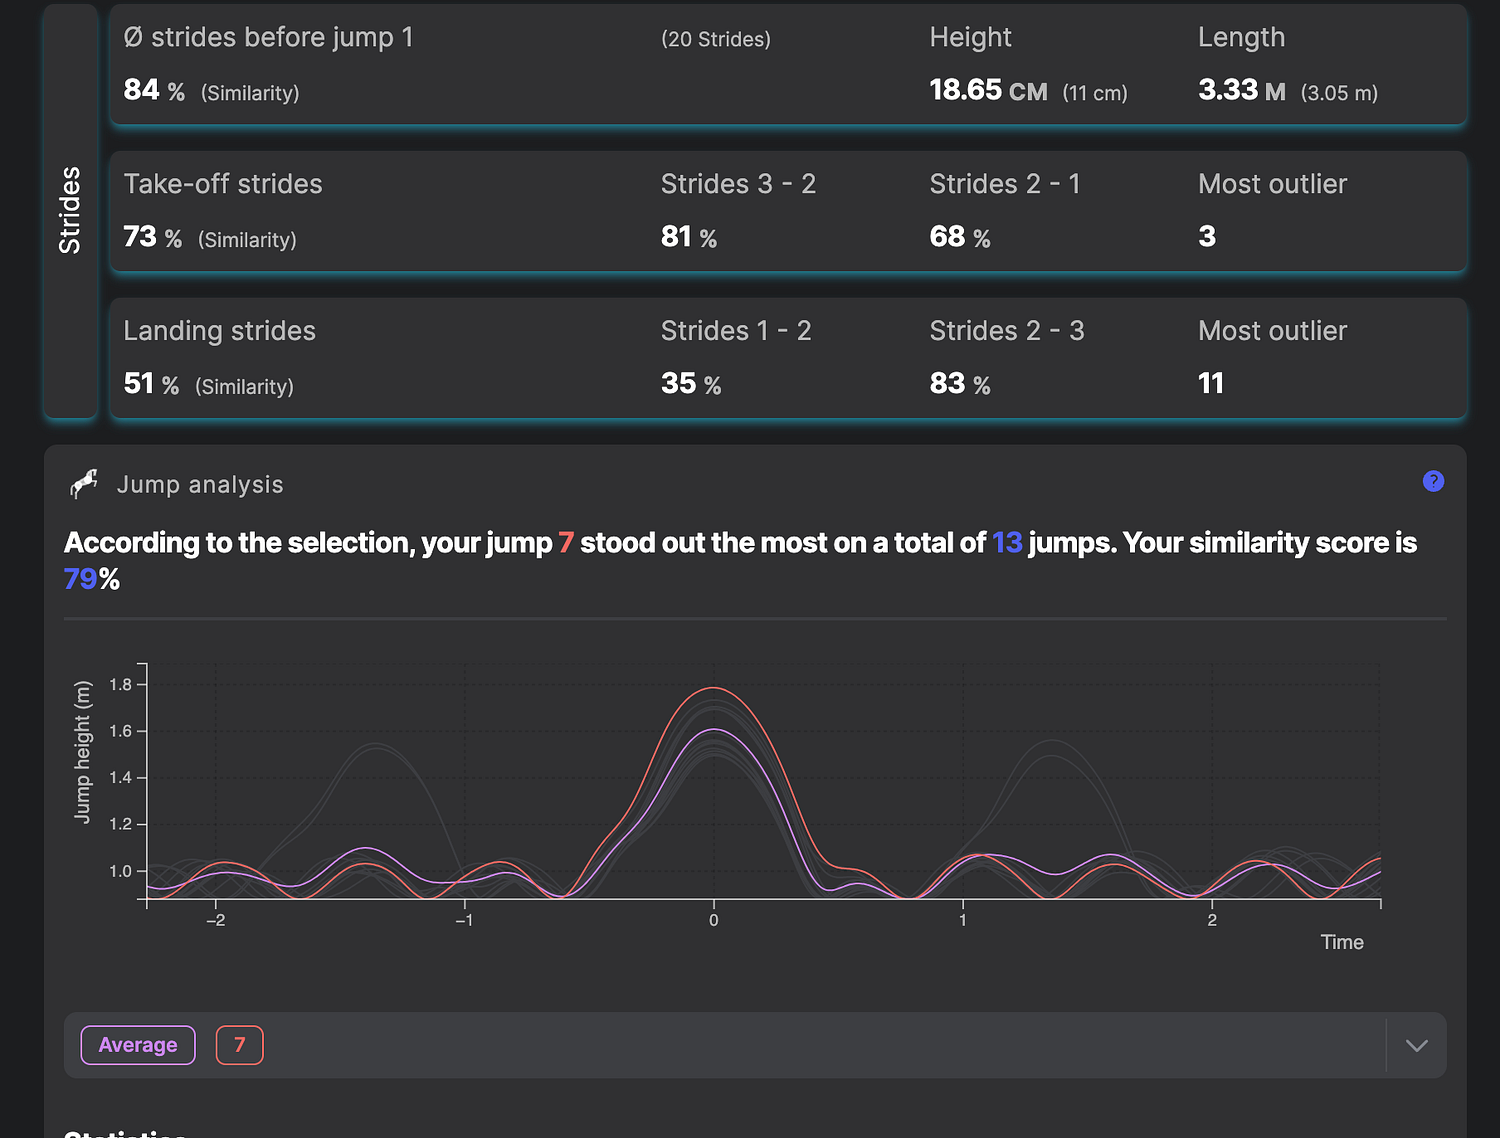
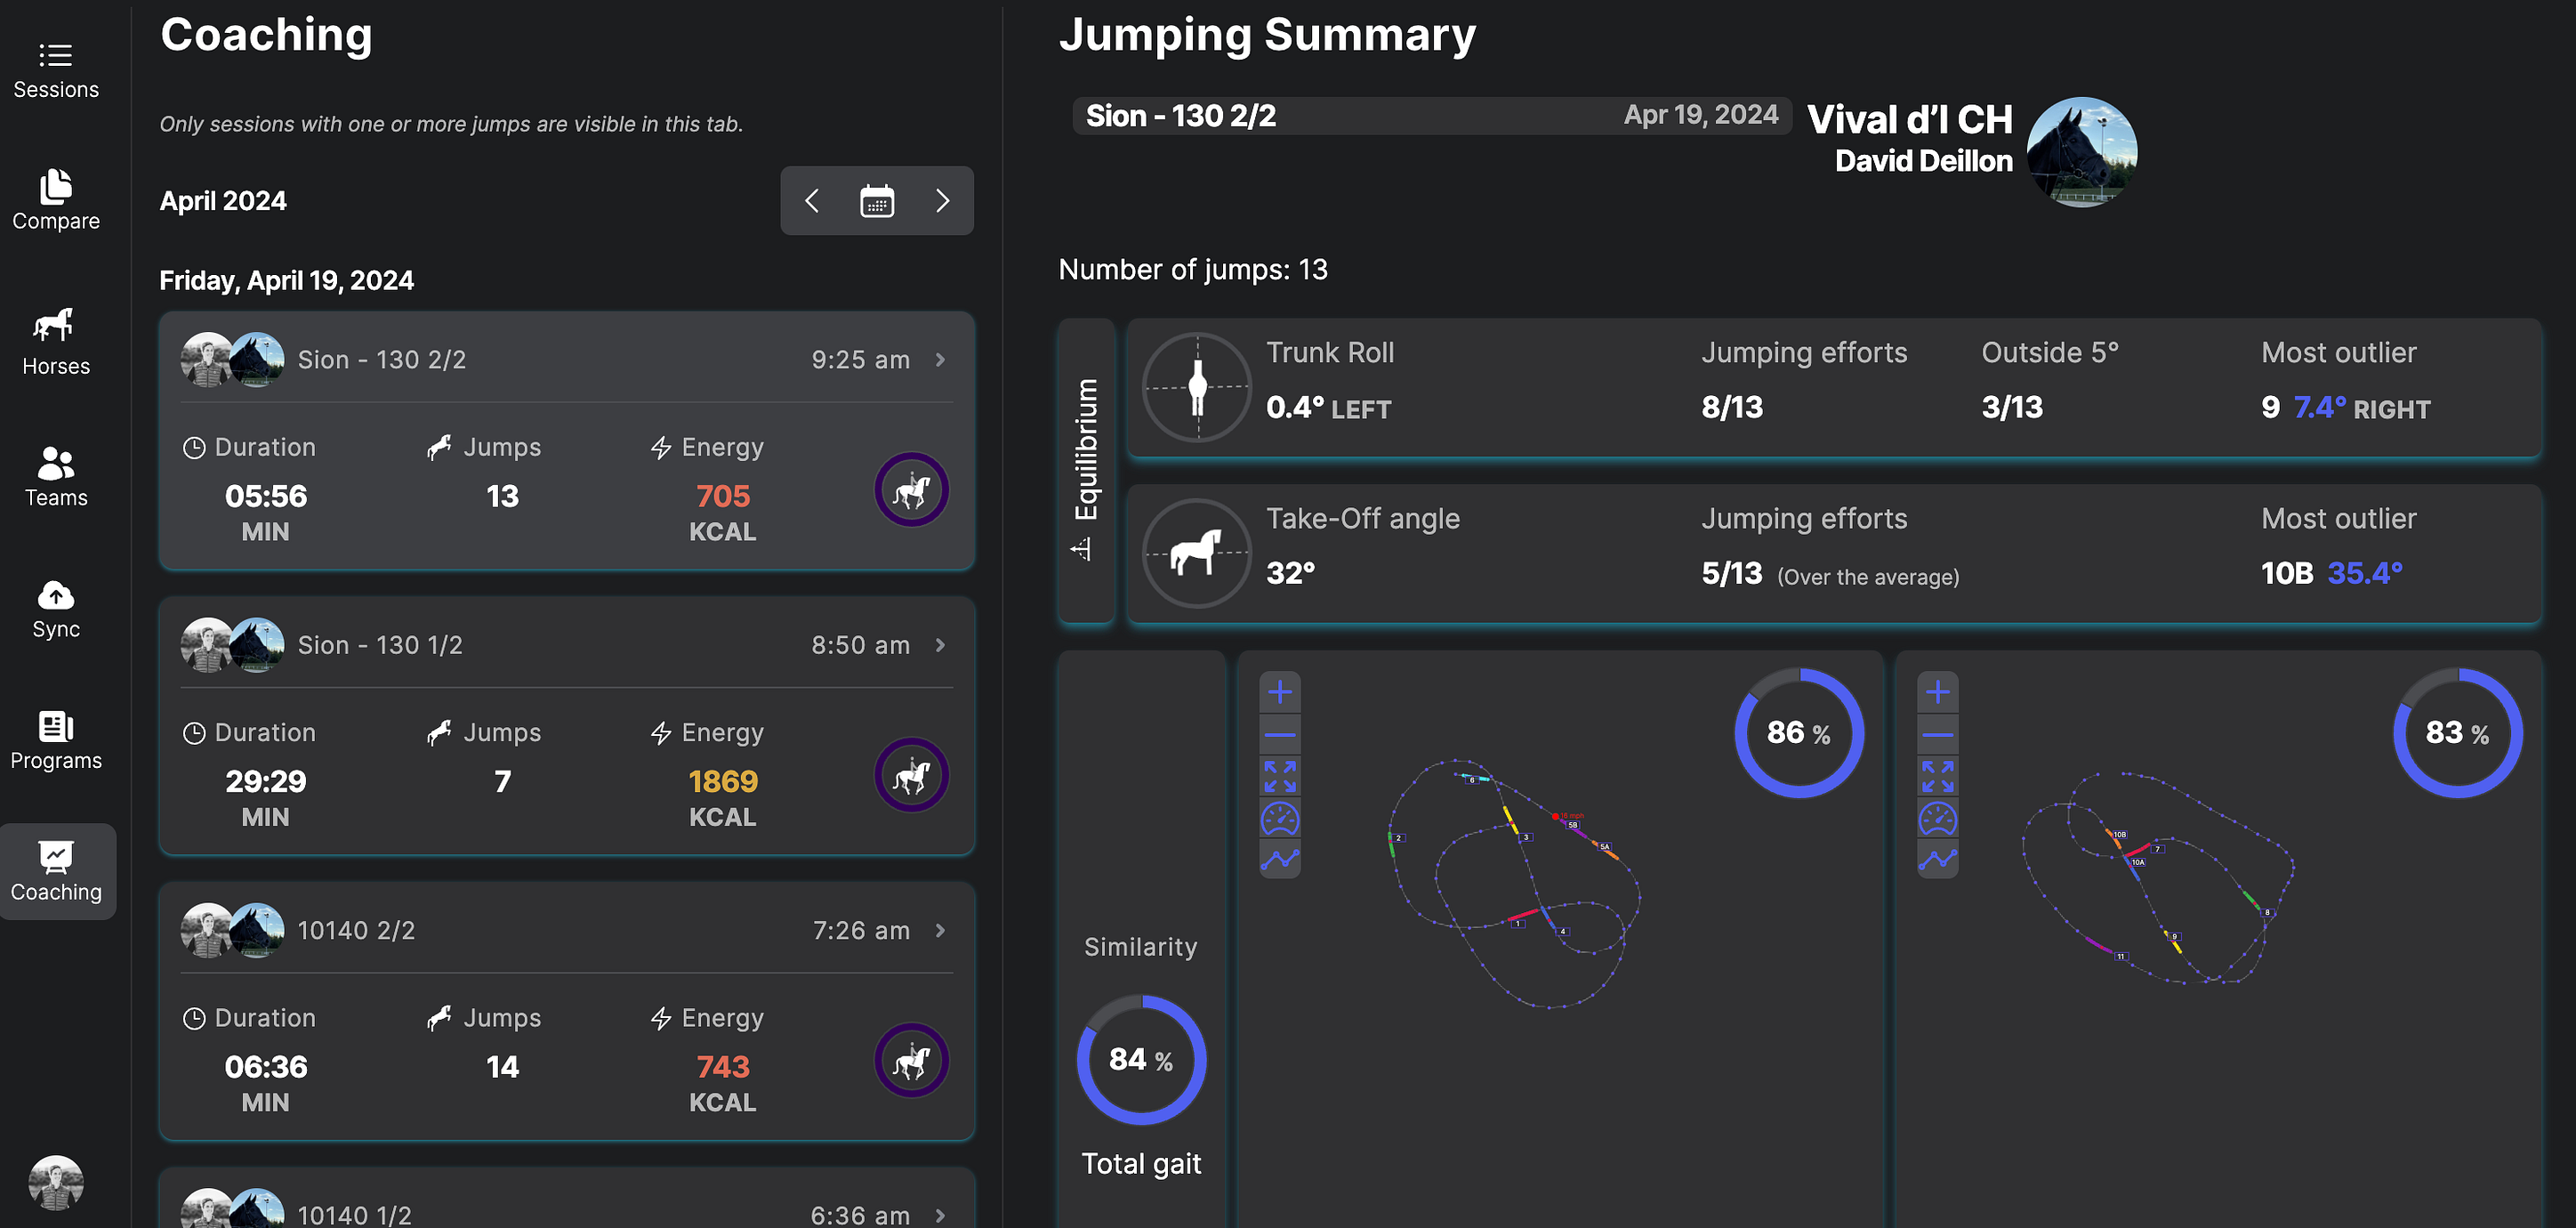
The coaching dashboard is available only for sessions with jumps detected.
Rehab & coaching programs
The Alogo Rehabilitation Program turns a written protocol into step-by-step instructions on the rider’s phone:
- Provide detailed instructions to the riders.
- Follow the rehabilitation of the horse and track key metrics.
- Be alerted if the rider doesn’t follow the instructions.
- Get an alert if the monitored horse’s health gets worse, and at what moment of the workout.
- For vets and trainers: a natural way to charge for your remote consulting.
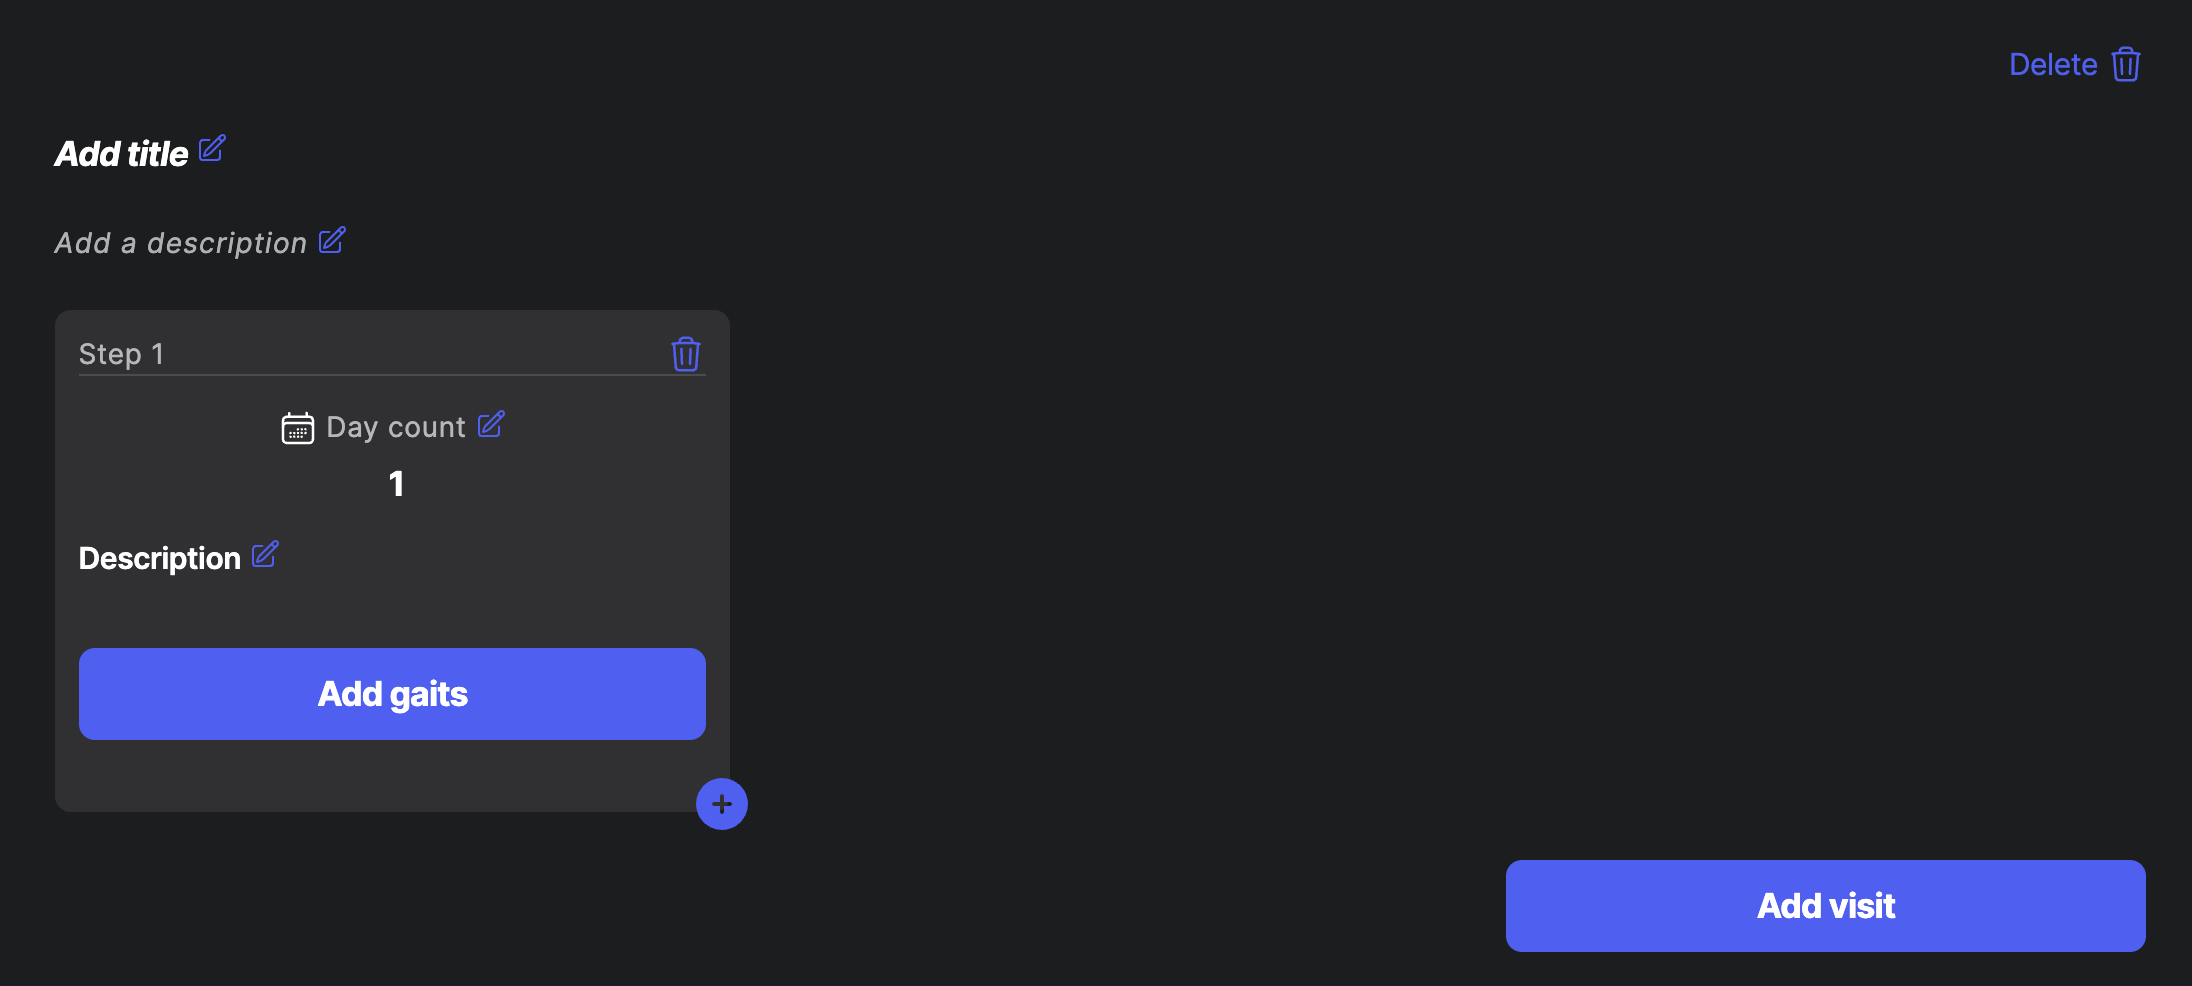
Create a program
- Open Programs and click Add.
- Add a title and a description for your program.
- For Step 1: plan how many days it lasts and provide a description.
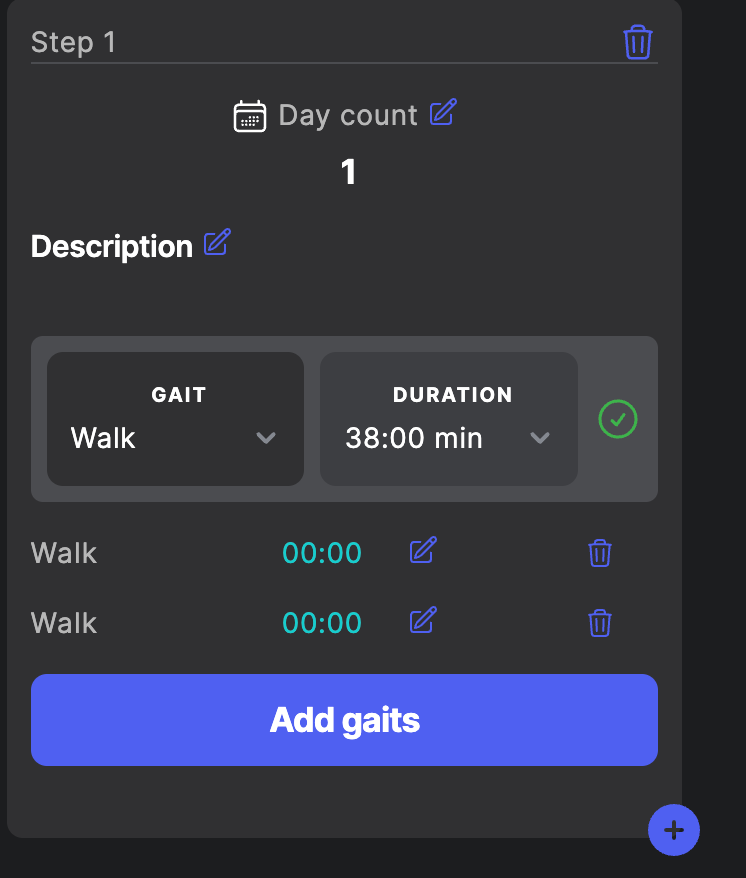
- Add the gaits: choose the gait and its duration, and validate.
- Add as many steps as needed, then save.
Be precise: the rider sees the exact gaits live as the session goes (the current gait, its countdown and what comes next). Detail exactly which gait, for how long and in which order, e.g. Walk 5 min → Trot 3 min → Walk 5 min. Create a new step only when the protocol changes; a step’s day count is how many days it must be applied.
Assign a horse to a program
To assign a horse, you must be the horse’s owner, or have been added as the horse’s veterinarian: the horse’s owner adds you on the horse profile (Veterinarian → Add). Being the veterinarian also gives you remote access to the horse’s data.
- Set the start date, assign the horse and select the program. A preview is displayed.
- Optionally add a vet-check exam to the program: date, reason and diagnosis.
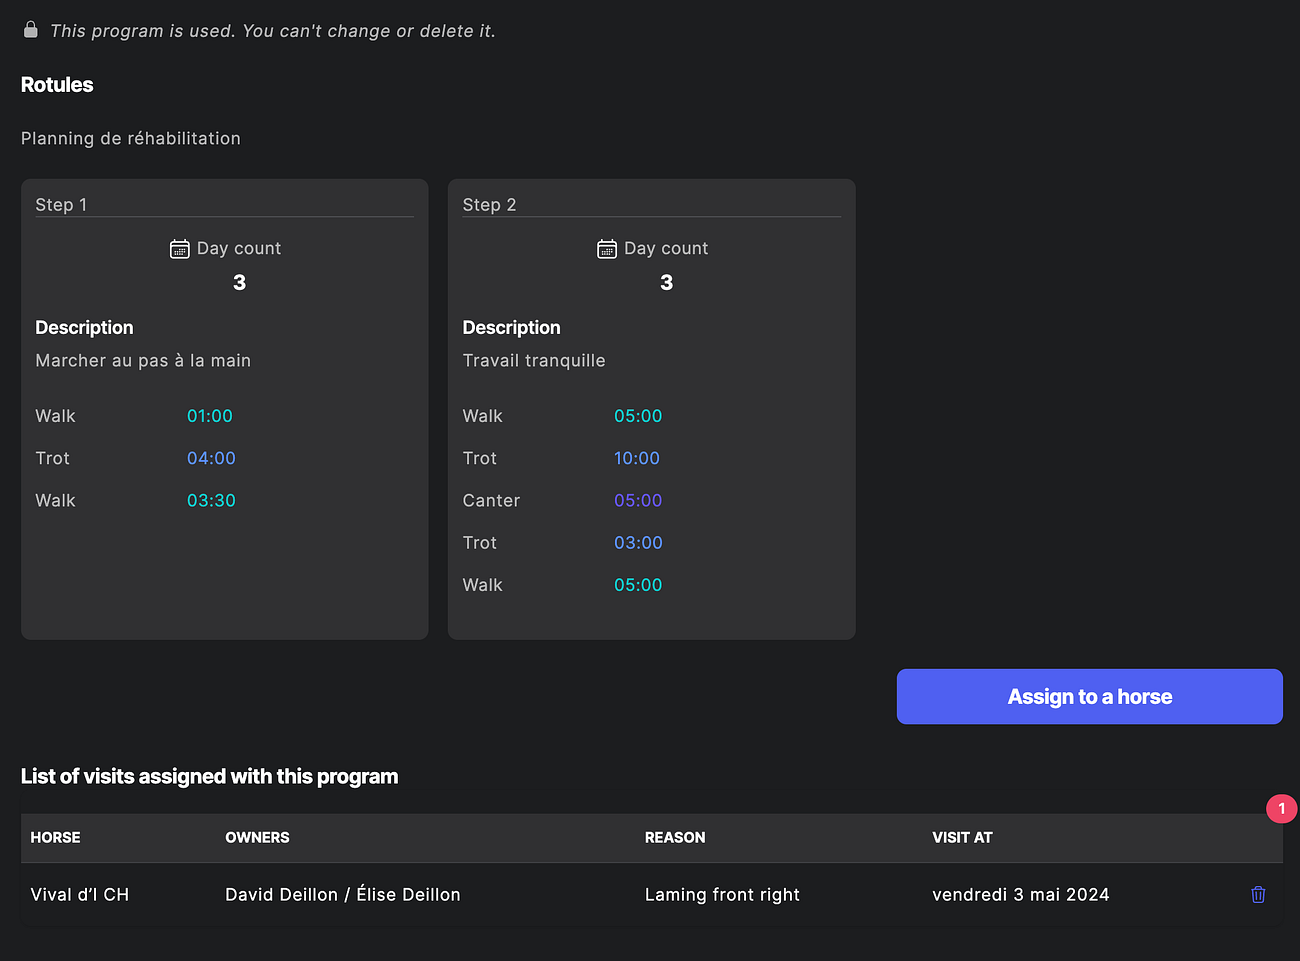
- Save. Horses assigned, owners and reasons for the visits are listed on the program.
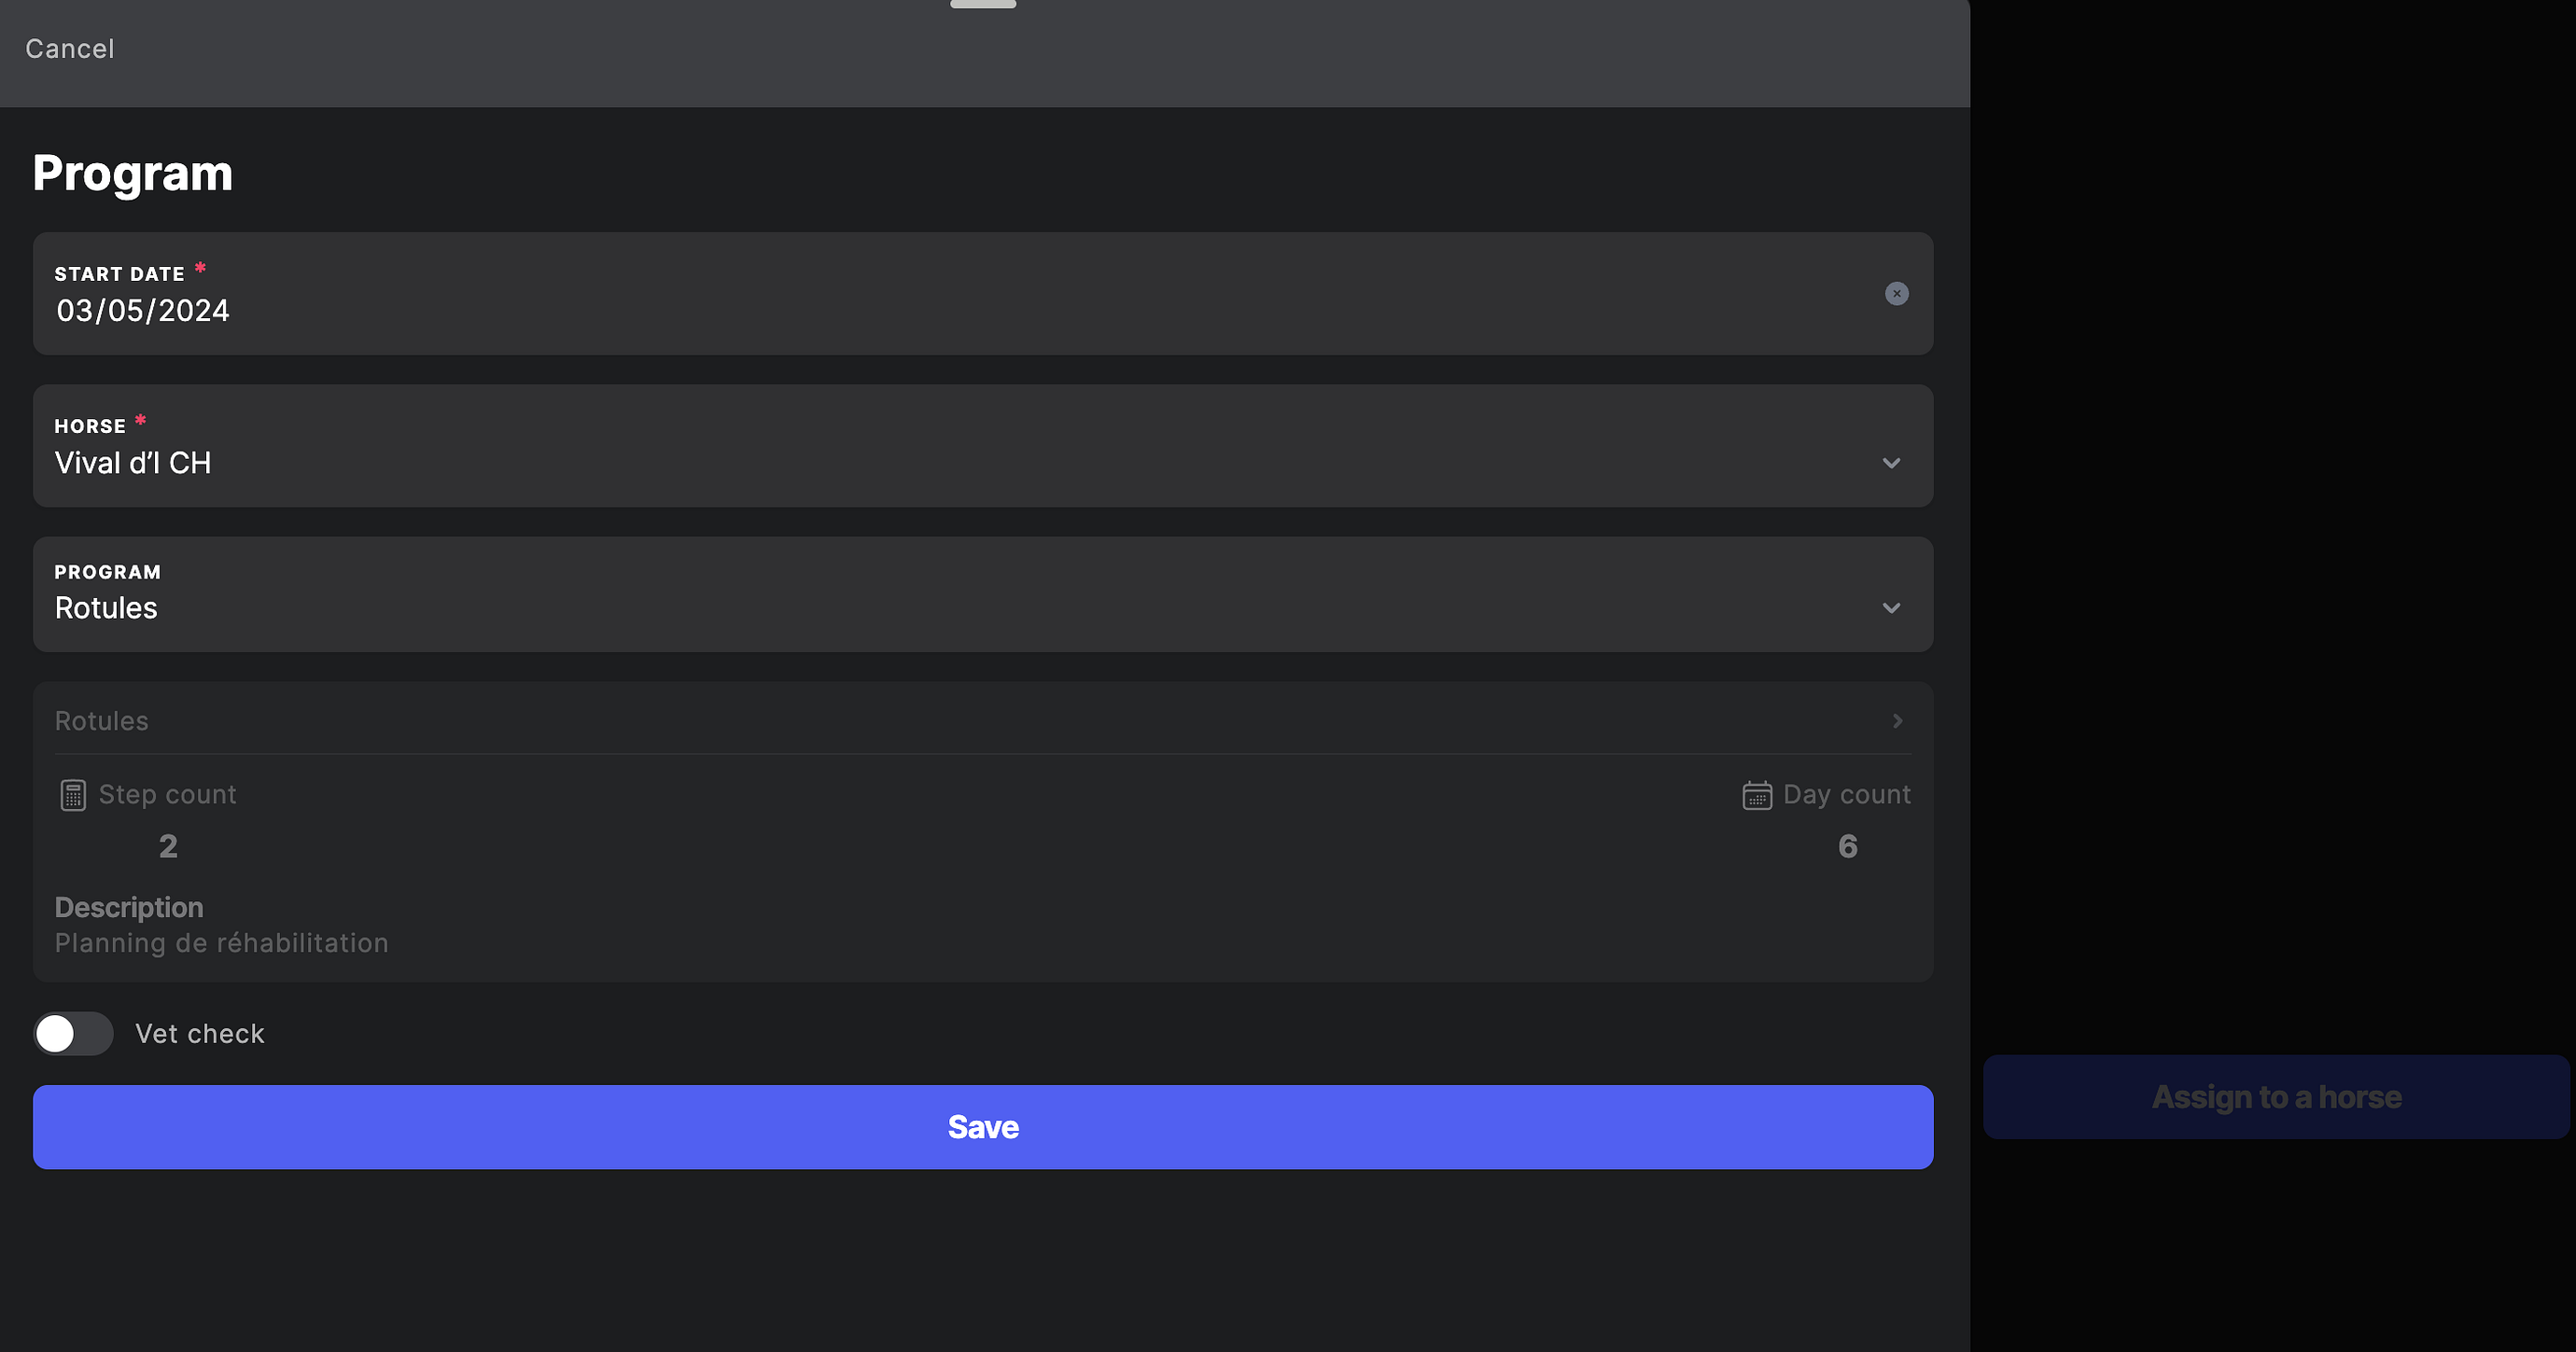
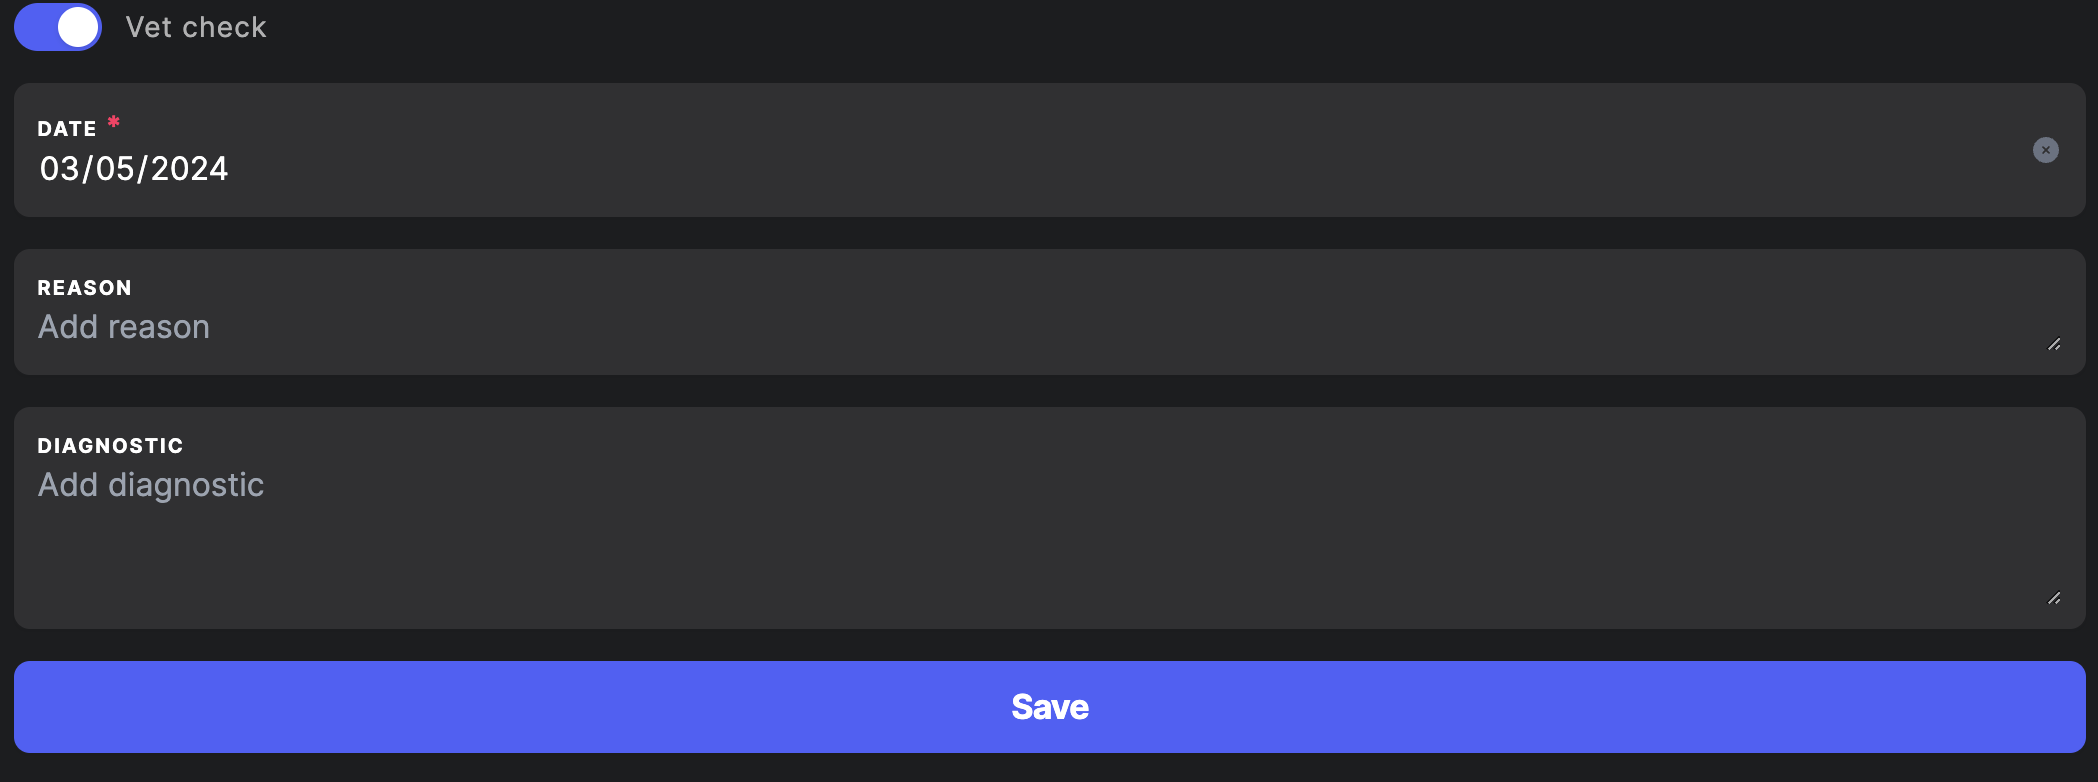
Once a program is used, it can’t be edited (or deleted). Double-check it before assigning.
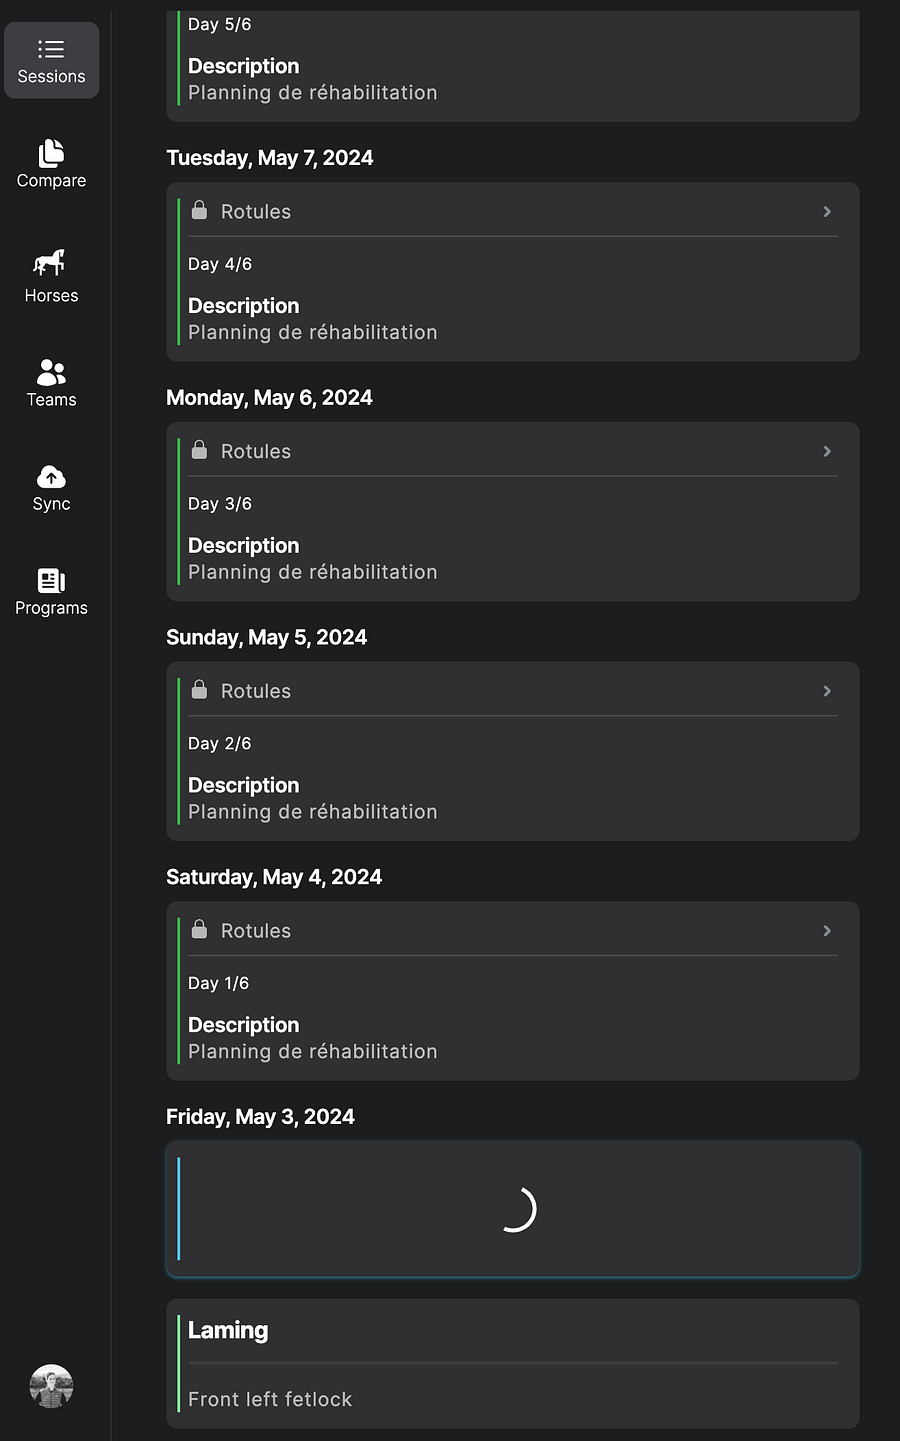
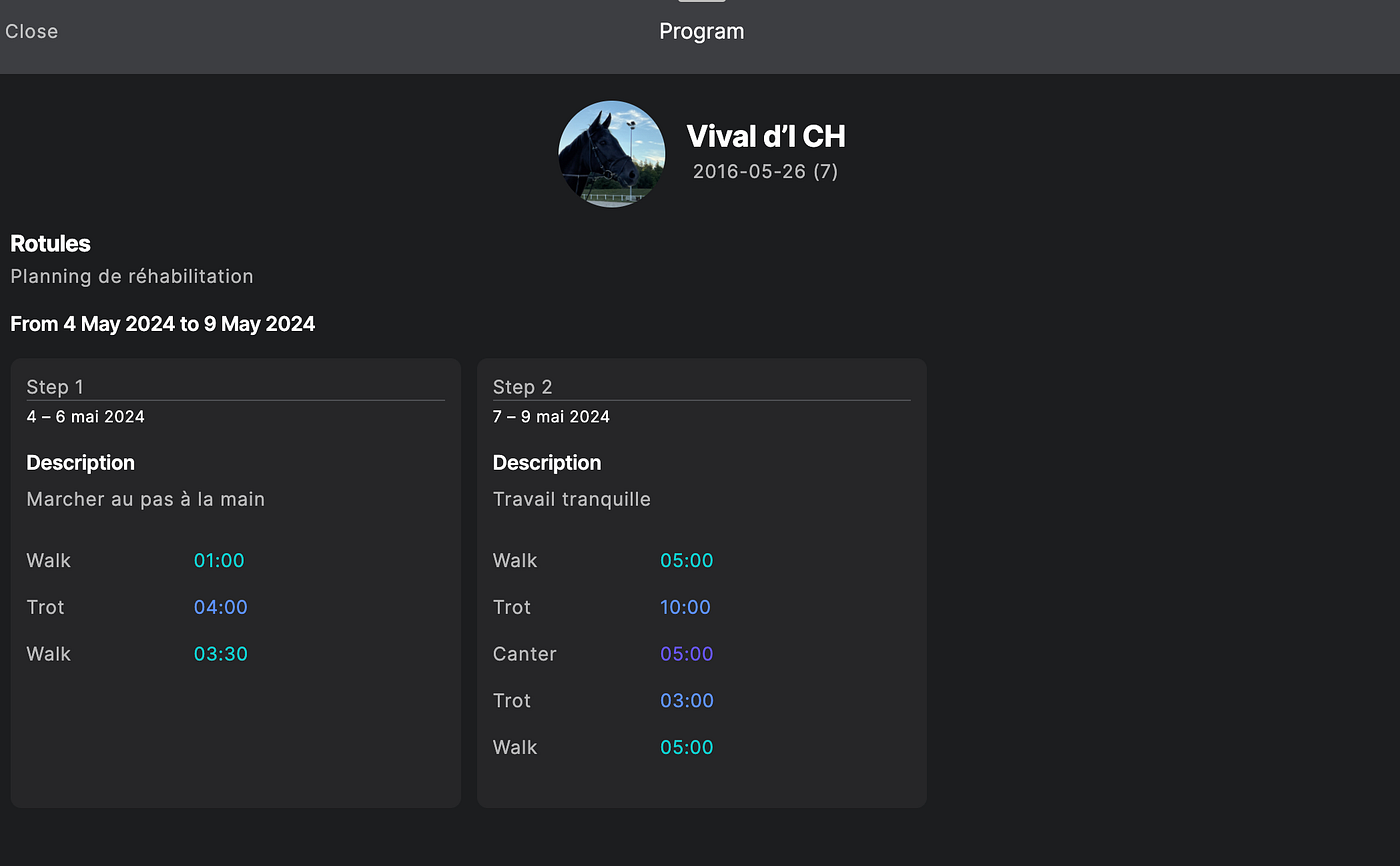
The rider’s view
The rider sees the program with its dates and steps; in the sessions list, the current day is highlighted and every day is displayed (tap for details), along with the diagnosis.
Start a program · mobile app only
- Connect to an Alogo Move Pro.
- Select the horse: a horse with an assigned program shows a dedicated icon.
- Start recording: the program title, the current gait and duration, and the remaining gaits are displayed.
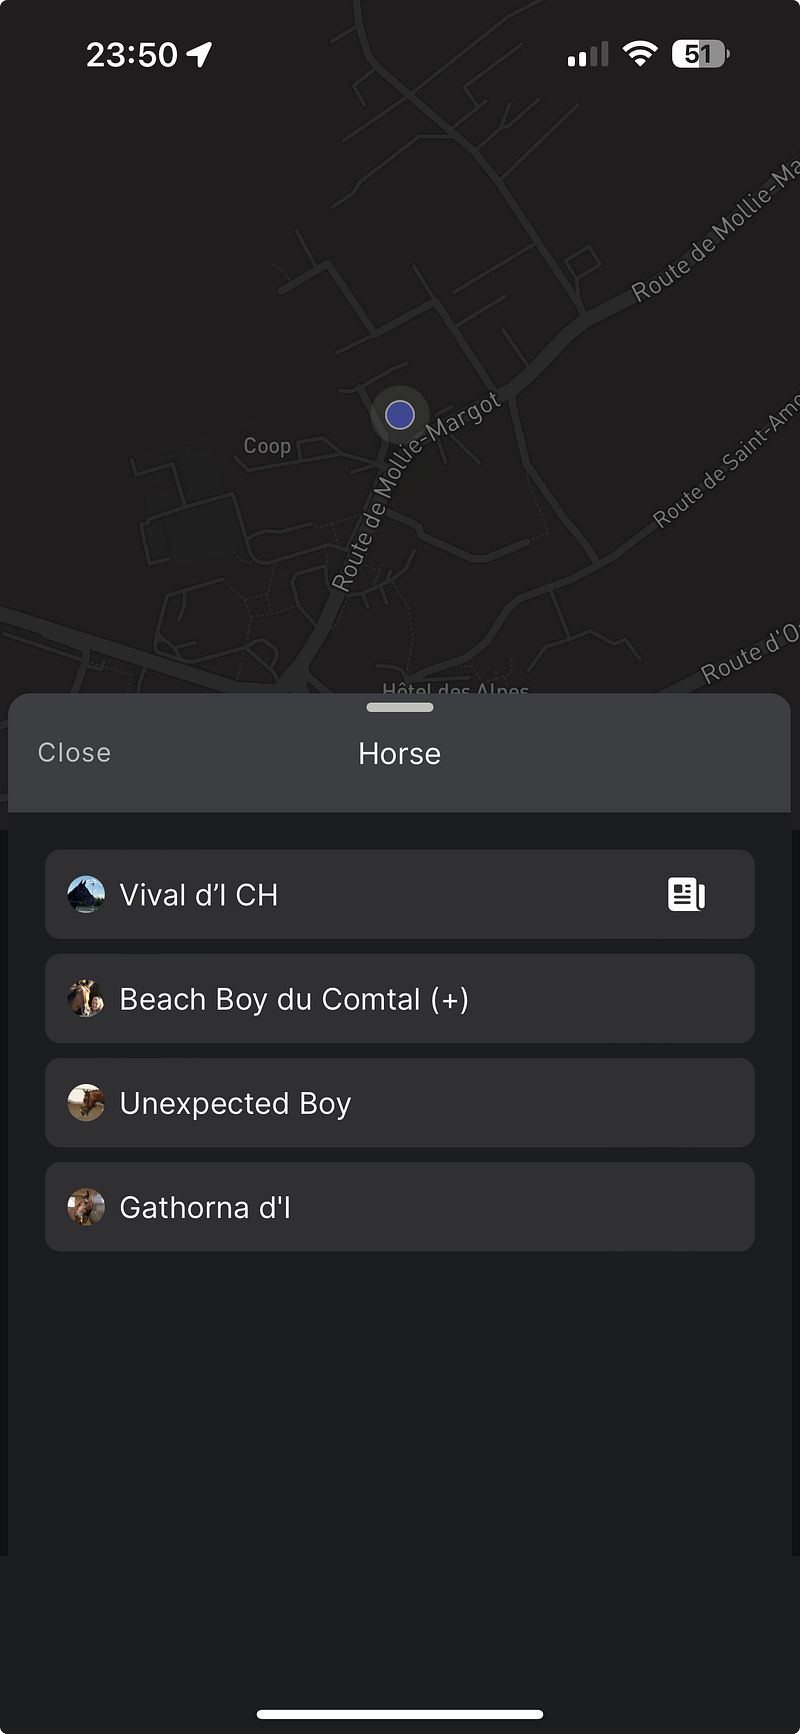
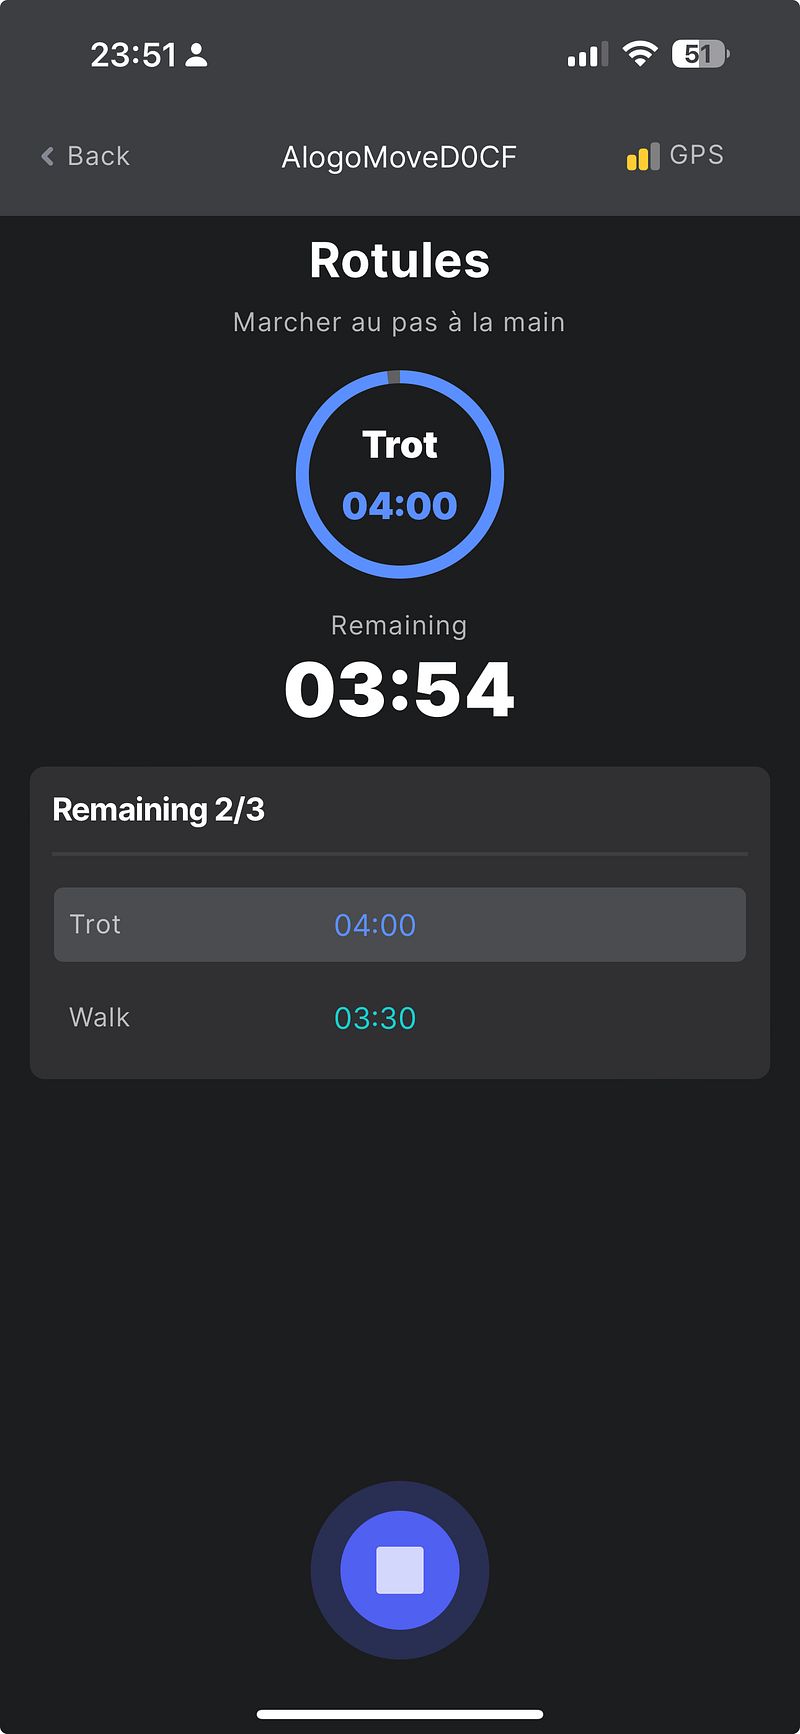
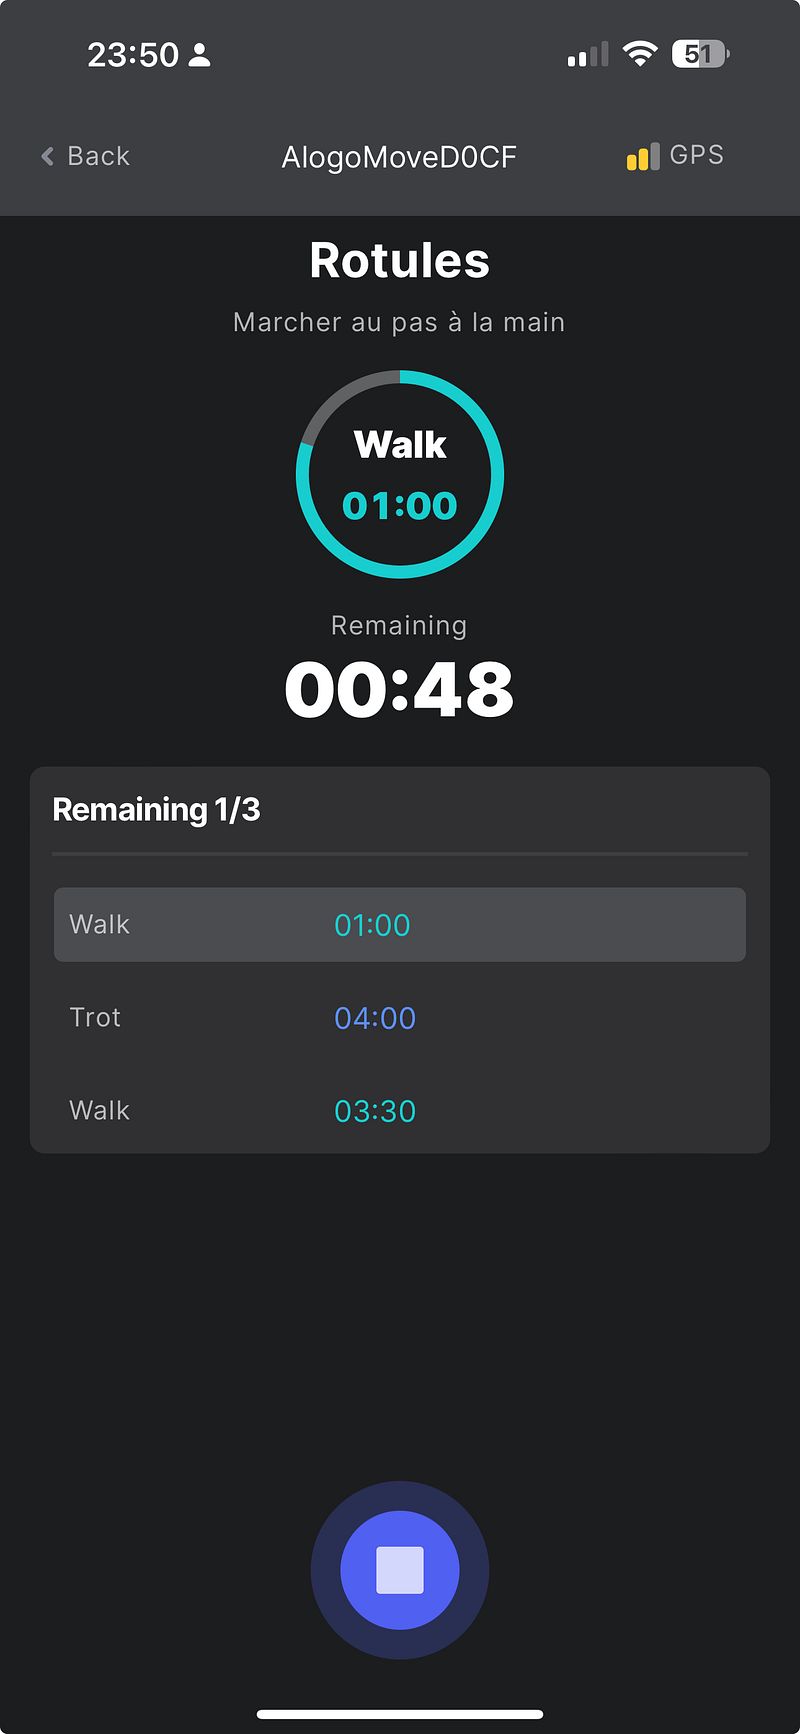
Don’t forget to stop the recording and to sync your session!
At every gait change, a chime rings. Make sure your smartphone’s sound is on (volume up, silent mode off) so you don’t miss it.
Next to come
- Push notification to get alerted when to change the gait.
- A simple comparison between the program and what has been done.
- Anomaly score included in the reporting.
Exports
Your profile must be activated as “Expert” to access the export features. The exports respect the current slider selection.
Export jumps
- Select the session.
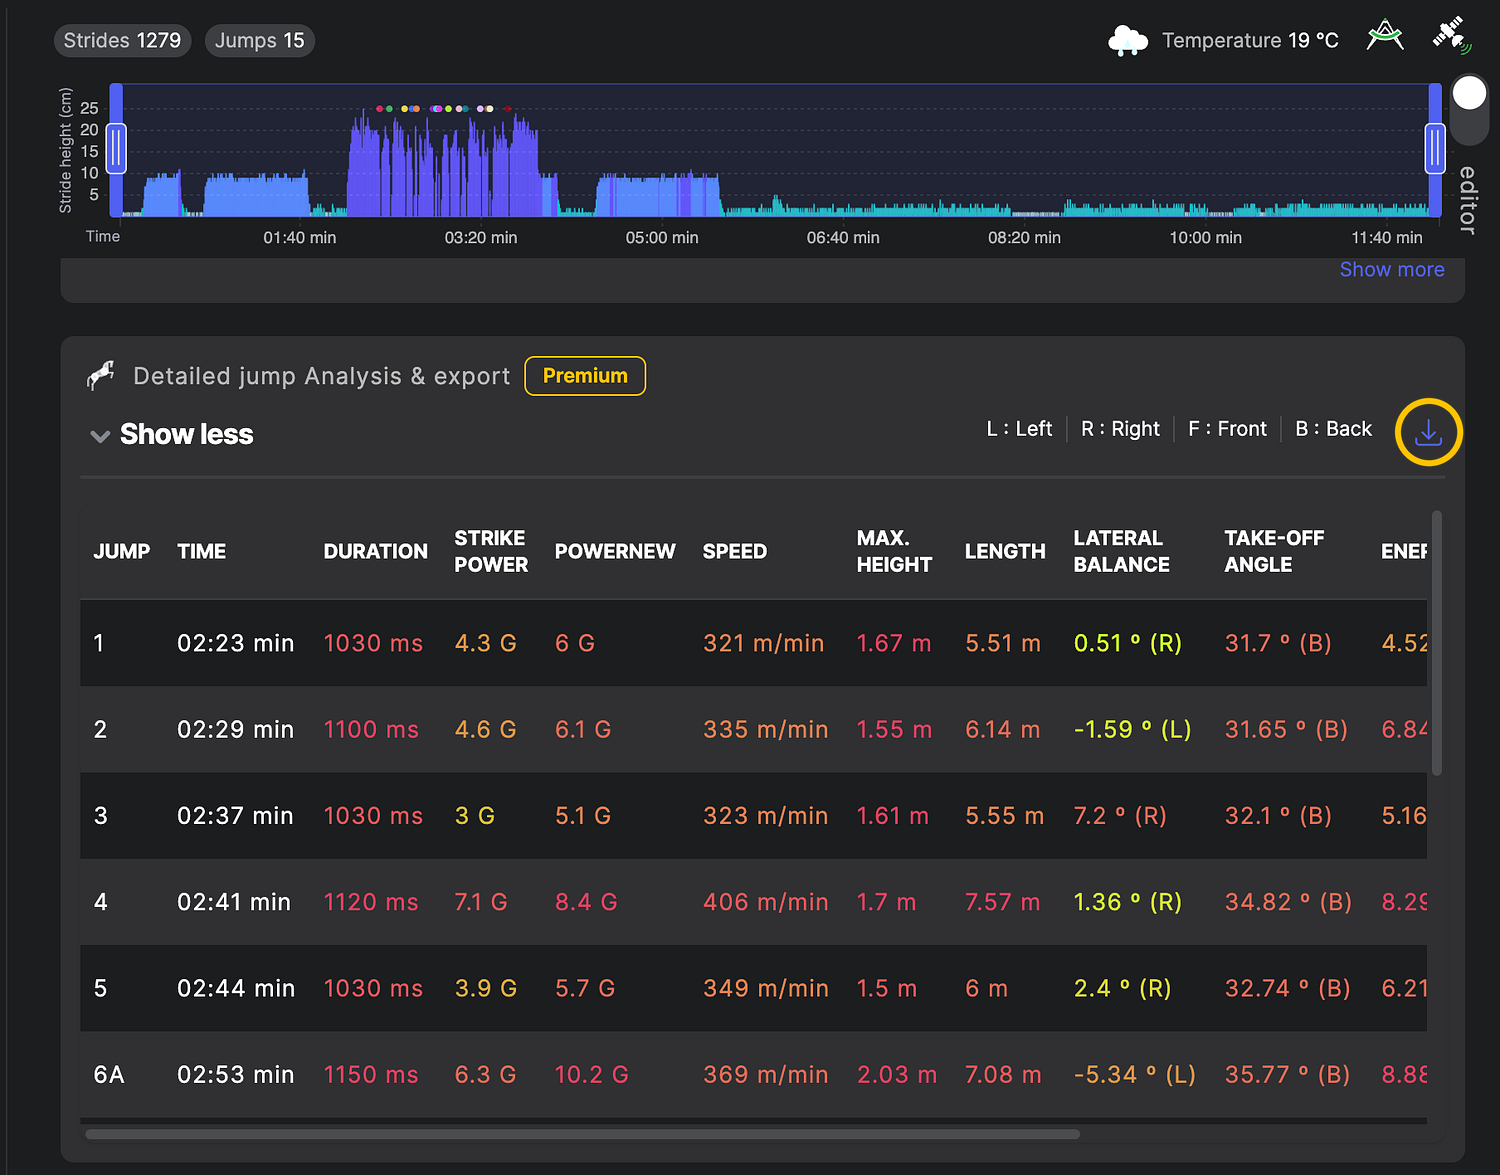
- Scroll to “Detailed jump analysis & export”.
- Click the download icon.
The CSV file contains every jump the slider selects, including 5 strides before and 5 strides after each jump. More strides are available on request.
Export strides
- Select the session.
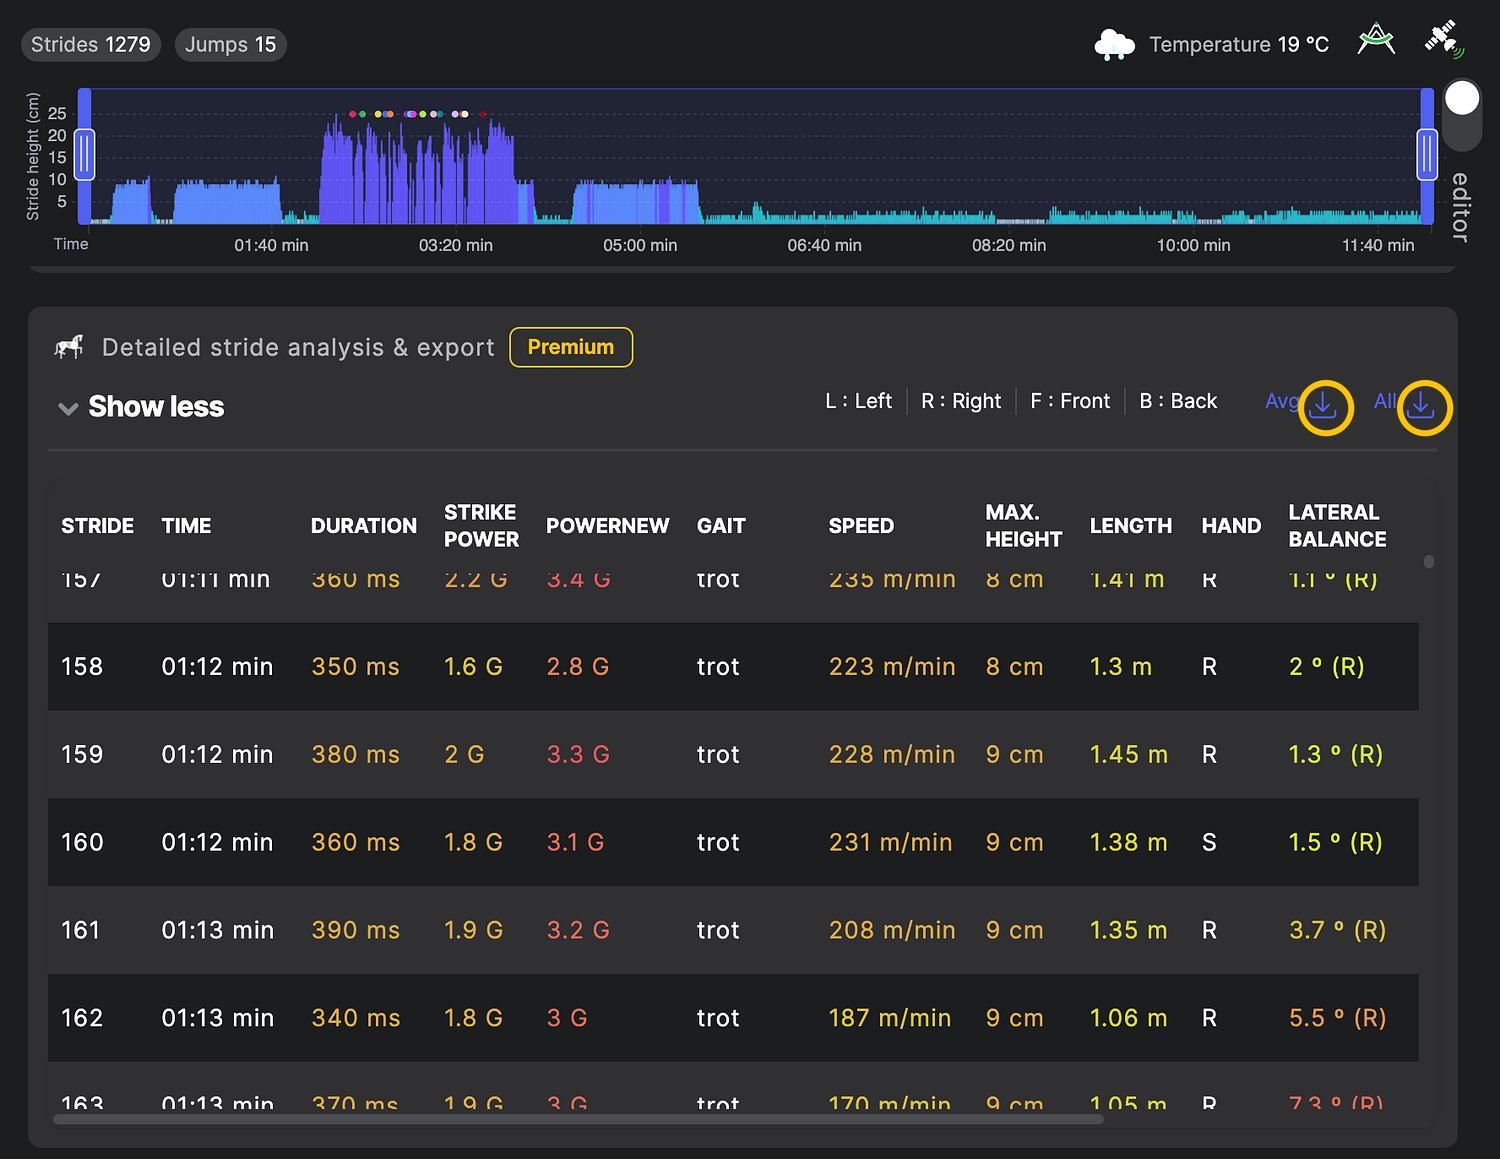
- Scroll to “Detailed stride analysis & export”.
- Click the download icon: Avg. exports the average data of your selection; All exports every stride as shown in the table.
Export racing
- Select the session.
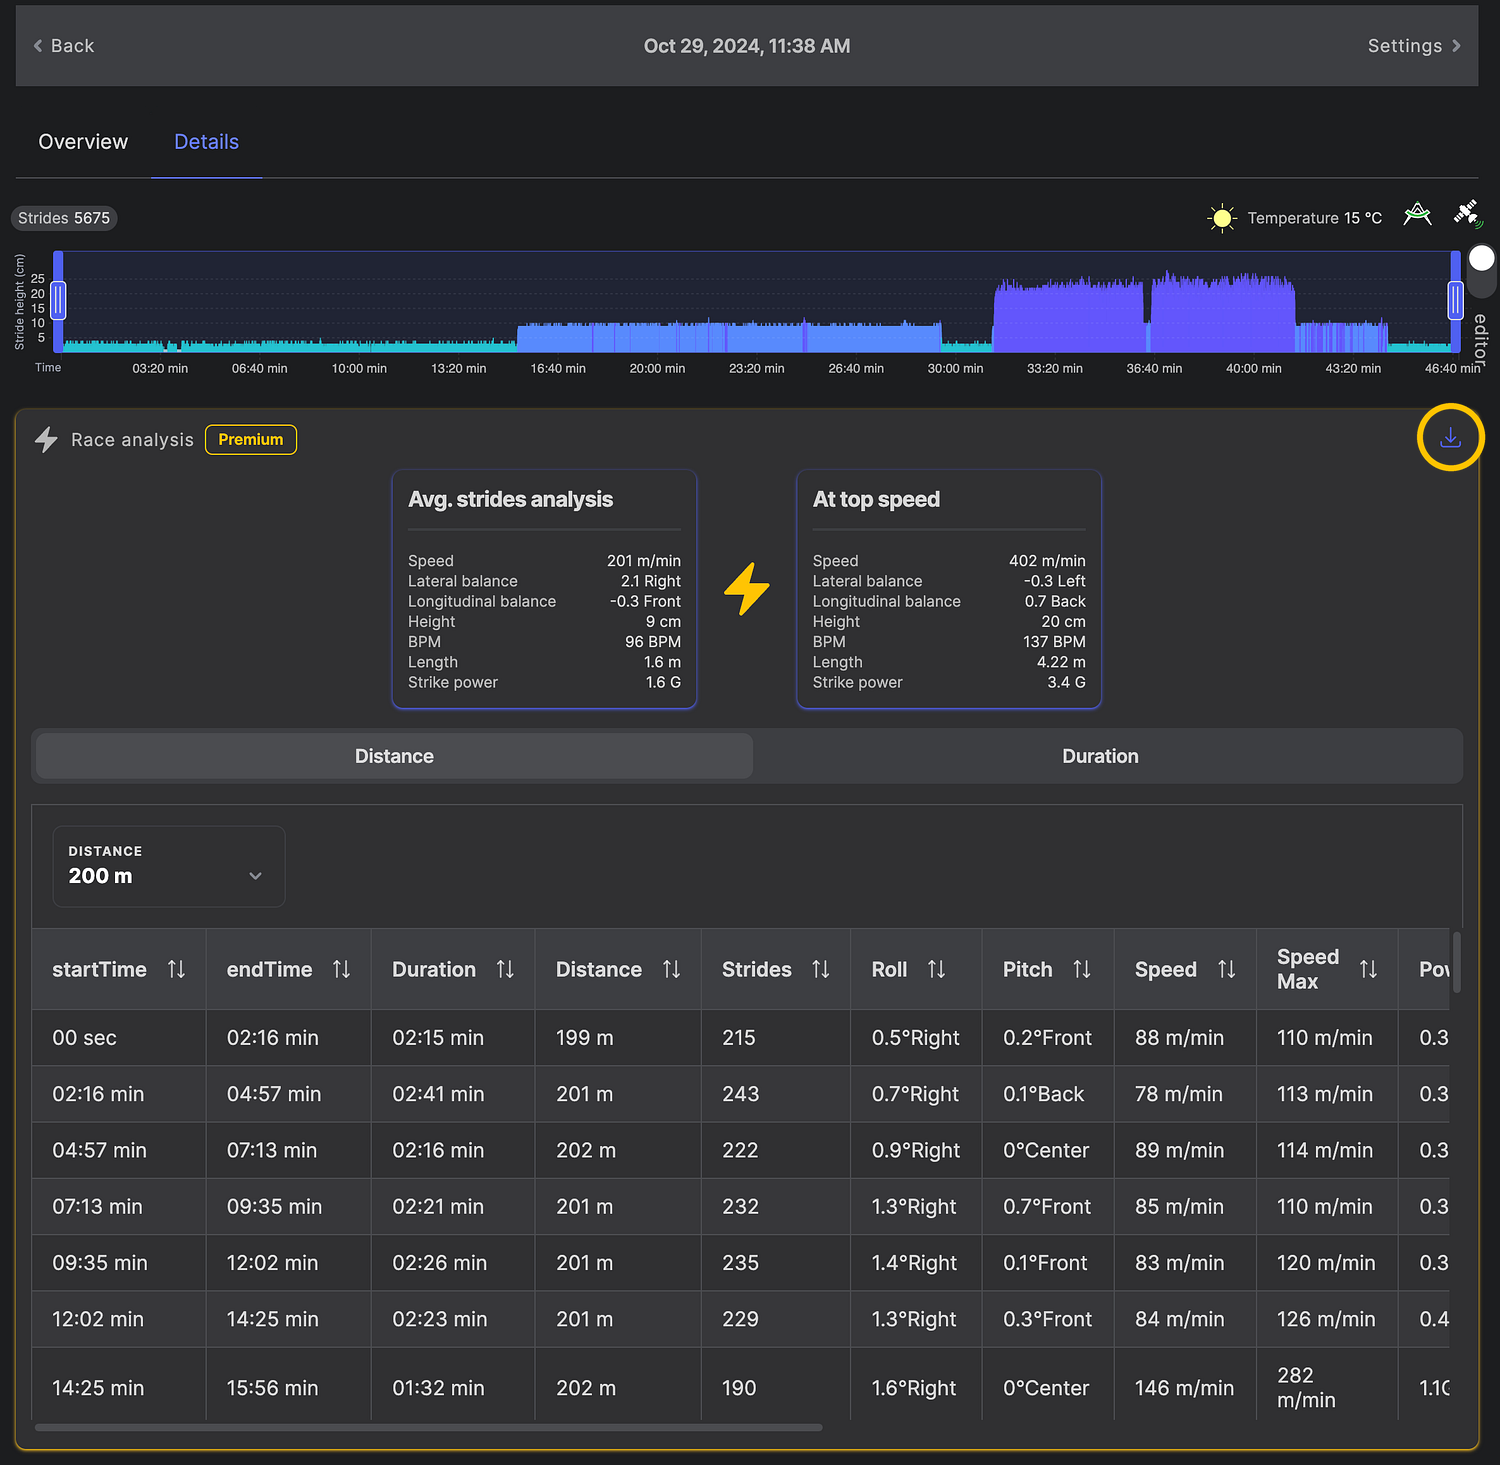
- Make sure the discipline is set to “Racing” under the session settings.
- In Race analysis, click the download icon.
You can sort the data by distance or by duration, and change the distance/duration of the segments.
Small jumps
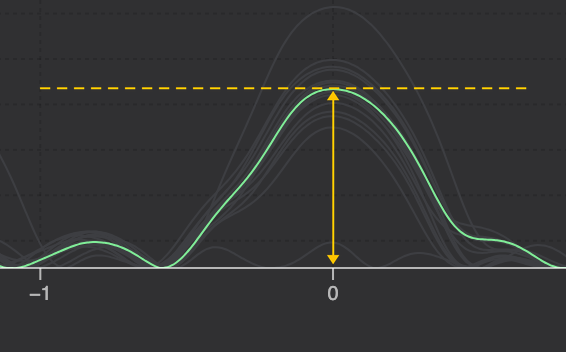
By default, the system hides small jumps where the height delta is below 30 cm. This threshold can be changed upon request by an Alogo member.
Polar heart rate
Setup
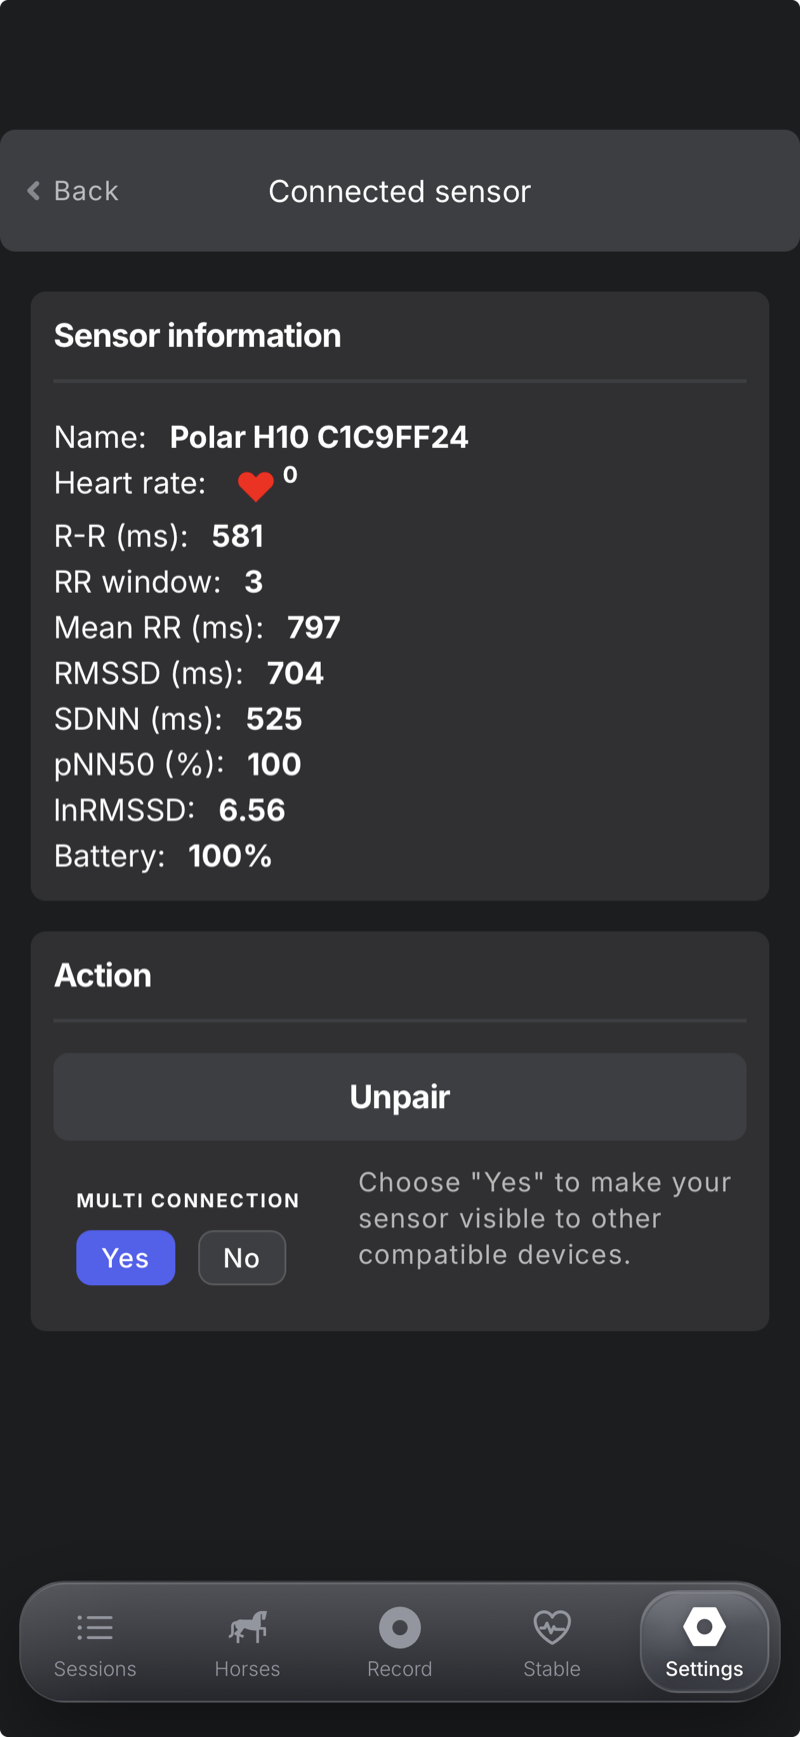
- Connect your Alogo and the Polar Equine to your smartphone.
- Start the recording with your smartphone.
After your ride
- Unlock your phone and patiently wait for the Polar & the Alogo to reconnect. This ensures all your ride data is properly synced and not lost.
- Stop the recording with your smartphone.
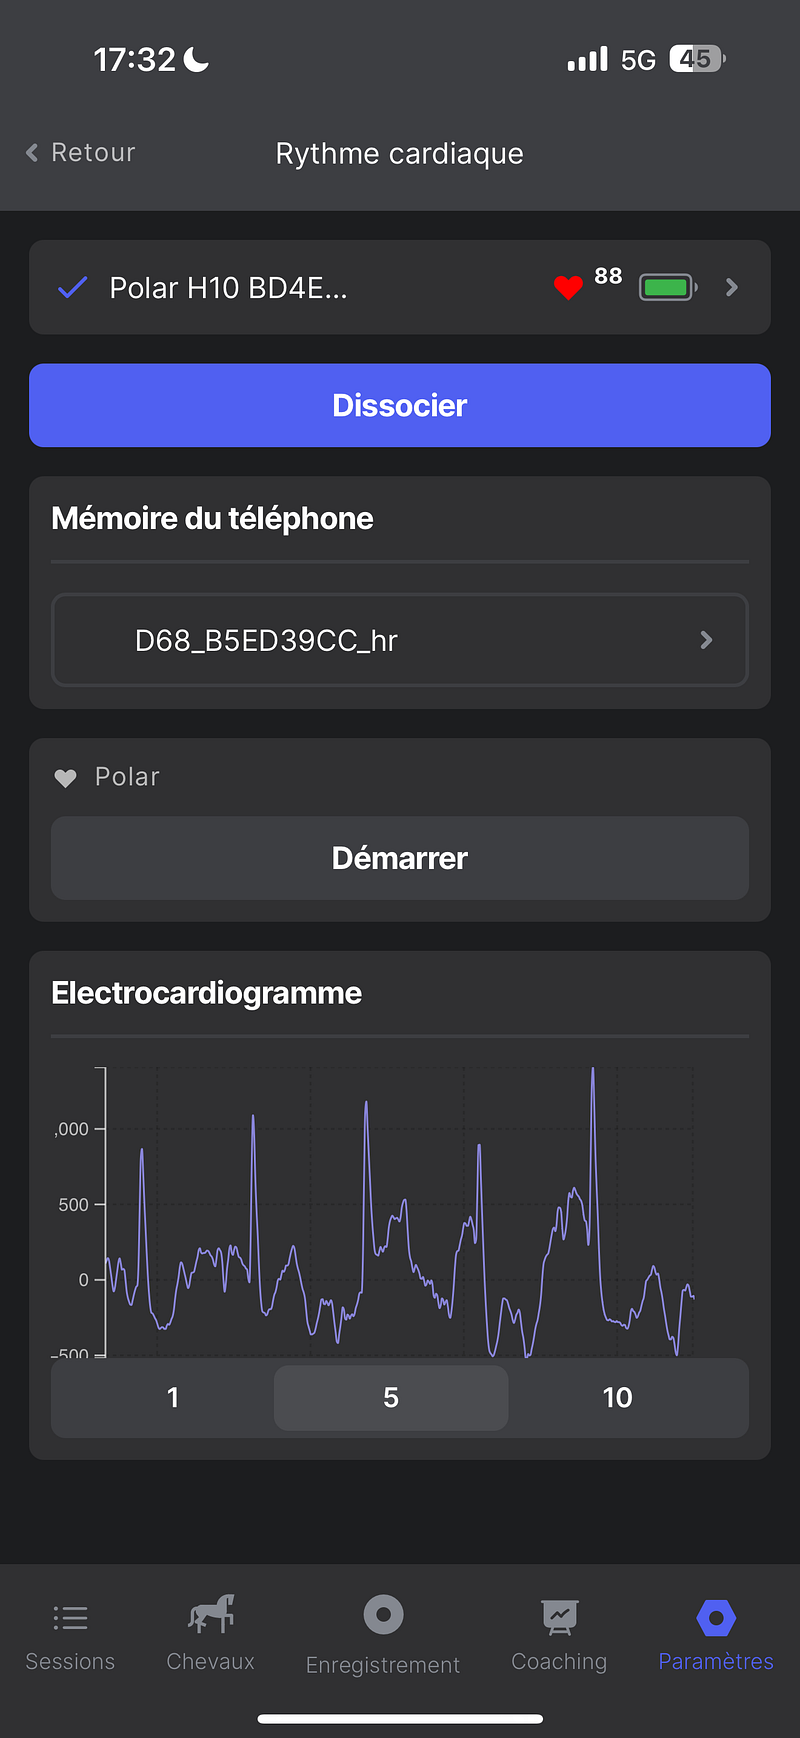
- Sync your Alogo with the same smartphone you used for the recording. Your Polar data should be shown before you sync.
“Polar exercise detected” modals
Depending on what is happening on your Polar, the app may show a “Polar exercise detected” modal:
- If your Polar is still recording when you start a new session, the app advises to stop that recording and save it on your device first.
- If an exercise sits in the Polar memory, save it on your device so it can be added to your session at sync time, or later from the session’s settings.
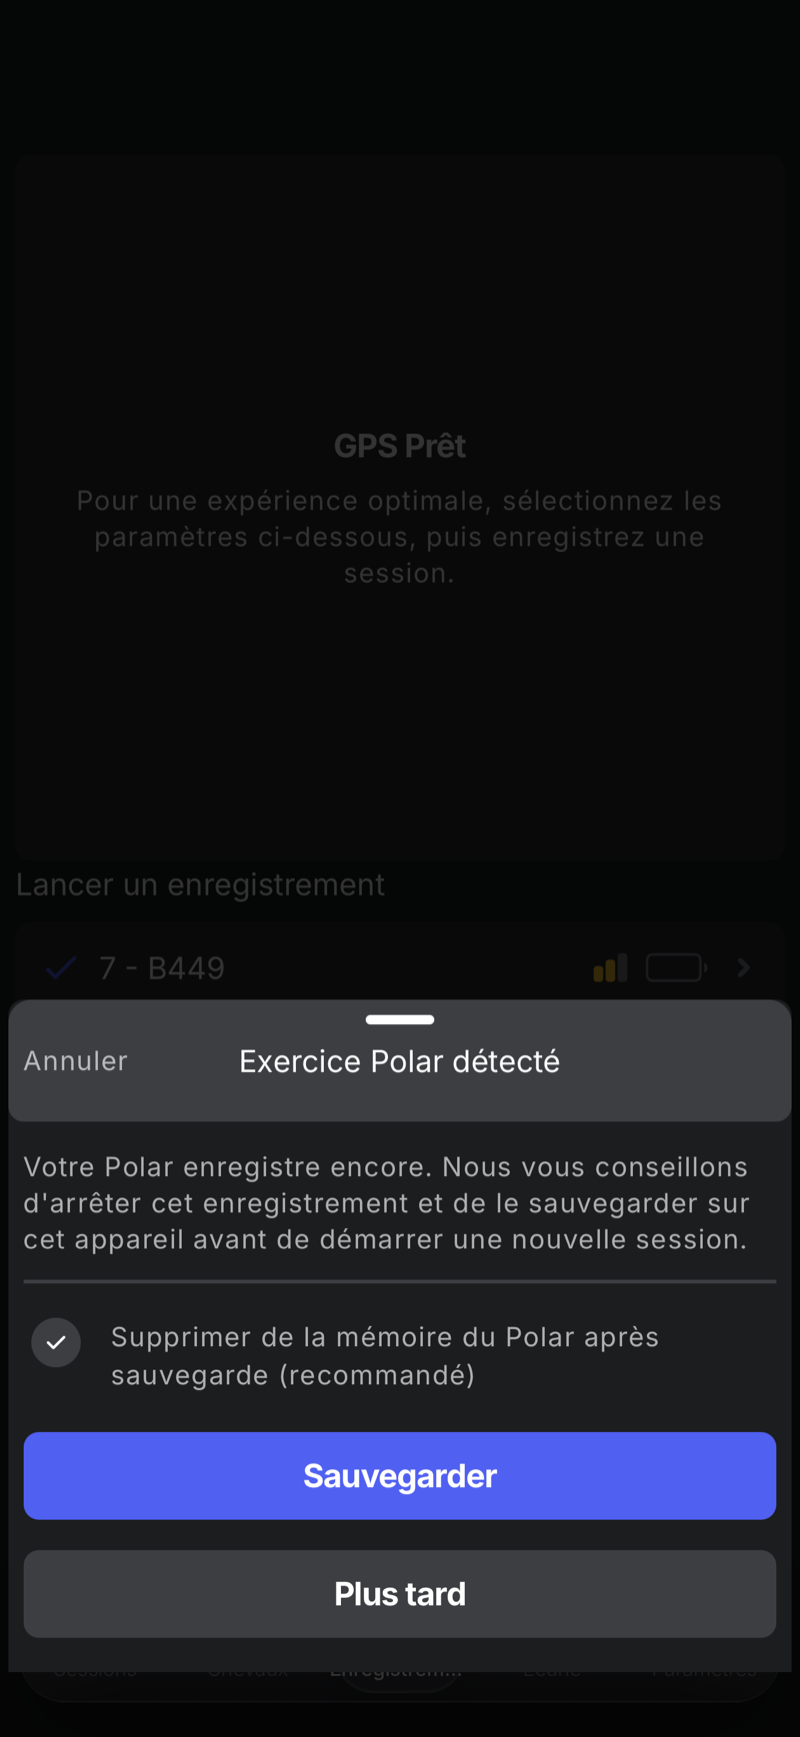
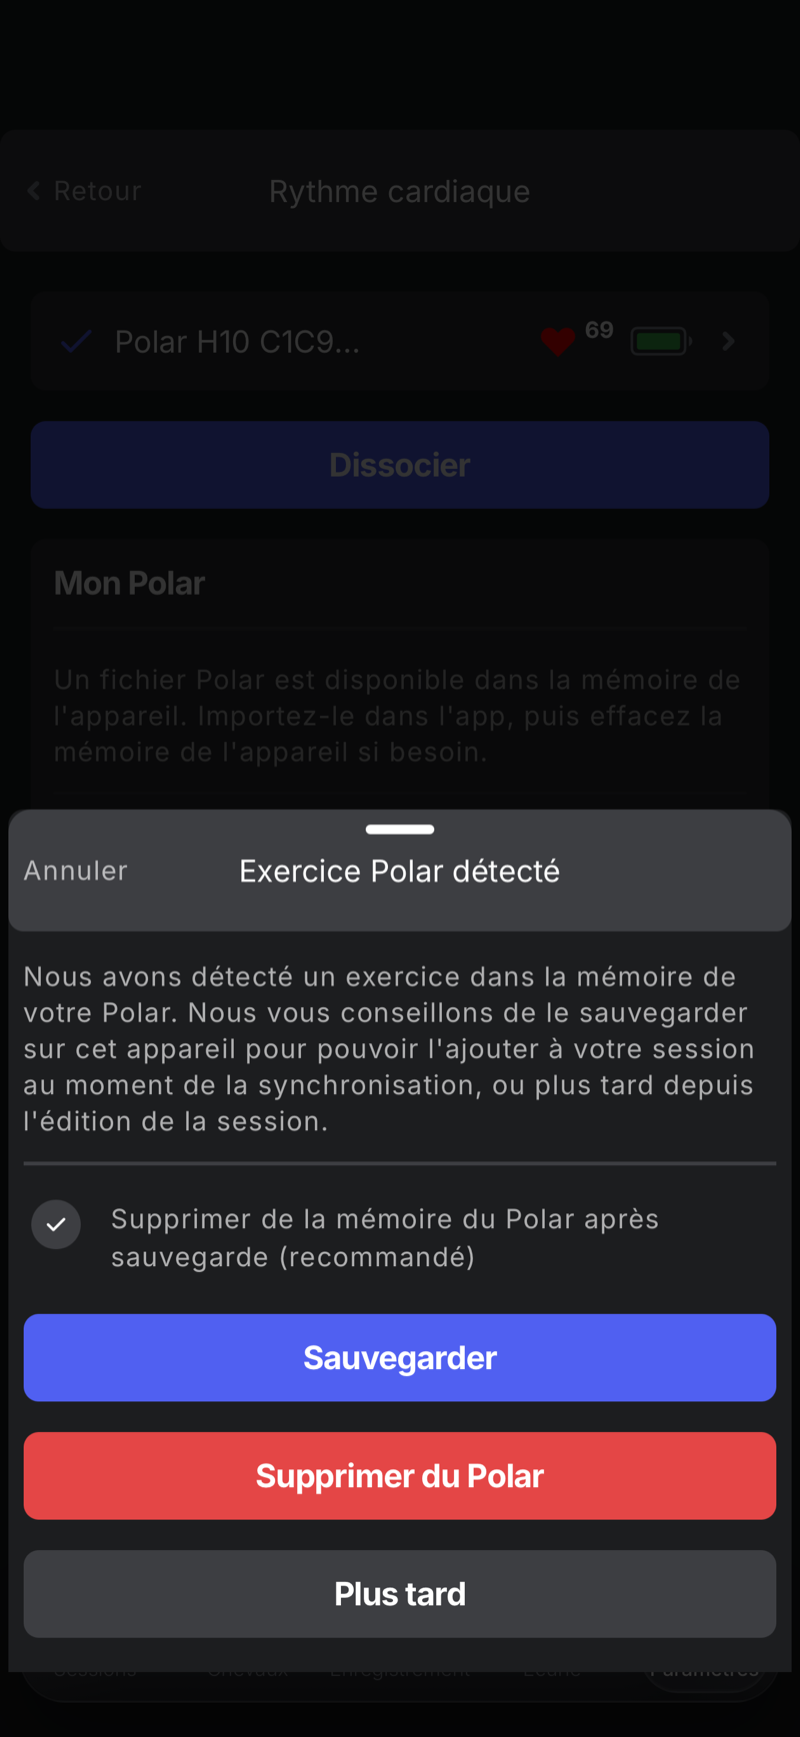
Keep “Delete from the Polar memory after saving” ticked (recommended). It keeps the sensor’s memory clean for the next ride.
Attach the Polar file to a session
Normally, when you open the session, a modal opens automatically to verify the horse, the rider and the discipline, and to add the Polar file to the session.
If that didn’t work, you can retrieve the file from the session settings:
- Open the session and click Settings.
- In the Heart rate block, pick the Polar recording of your ride and press Link session.
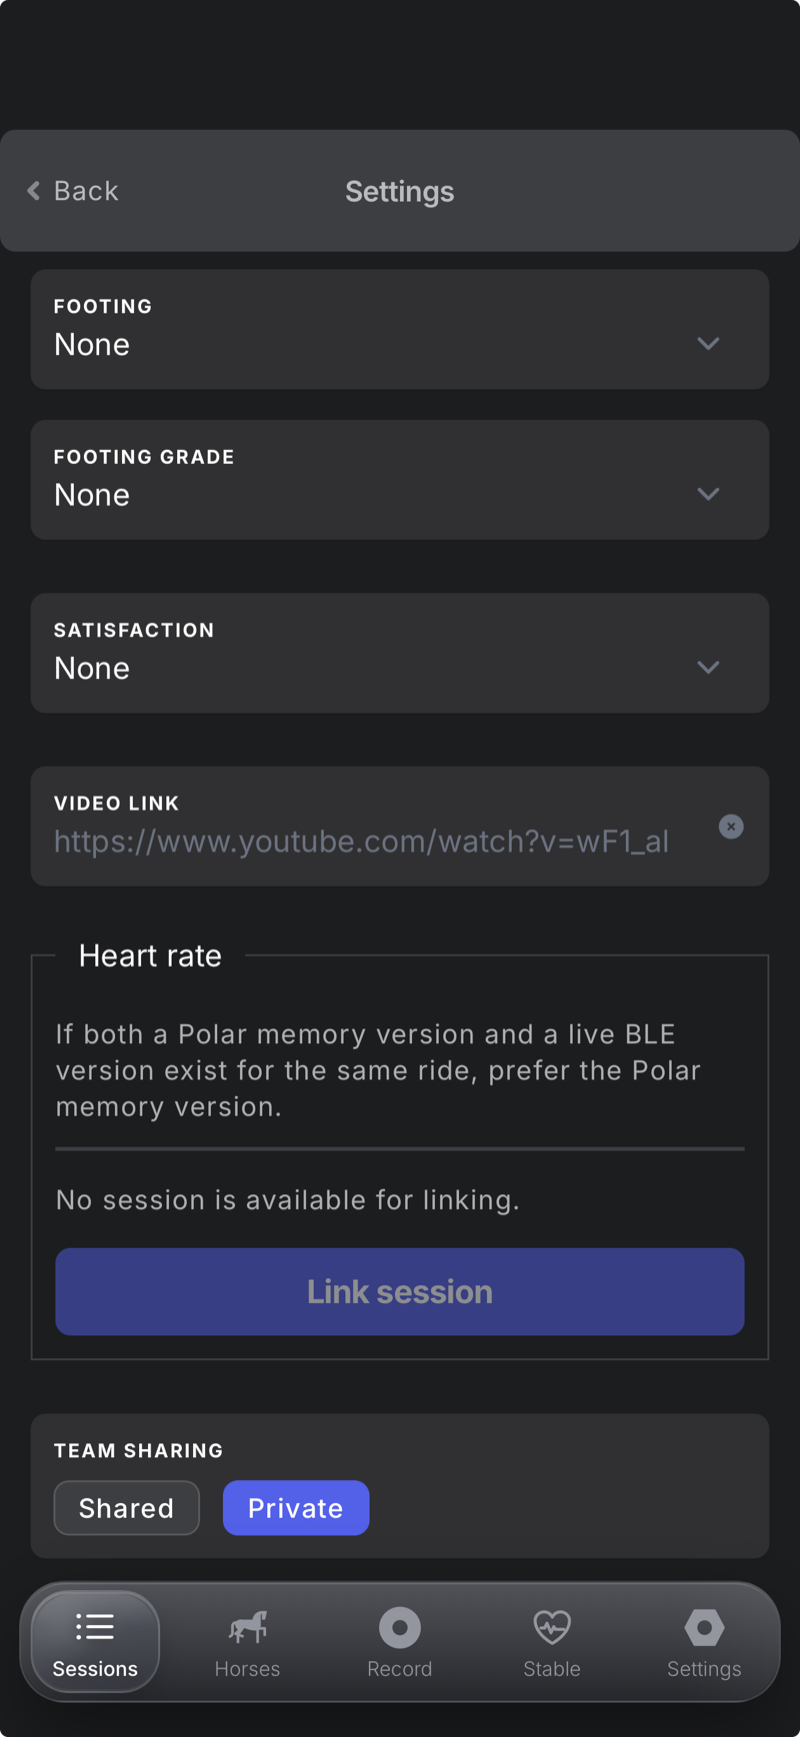
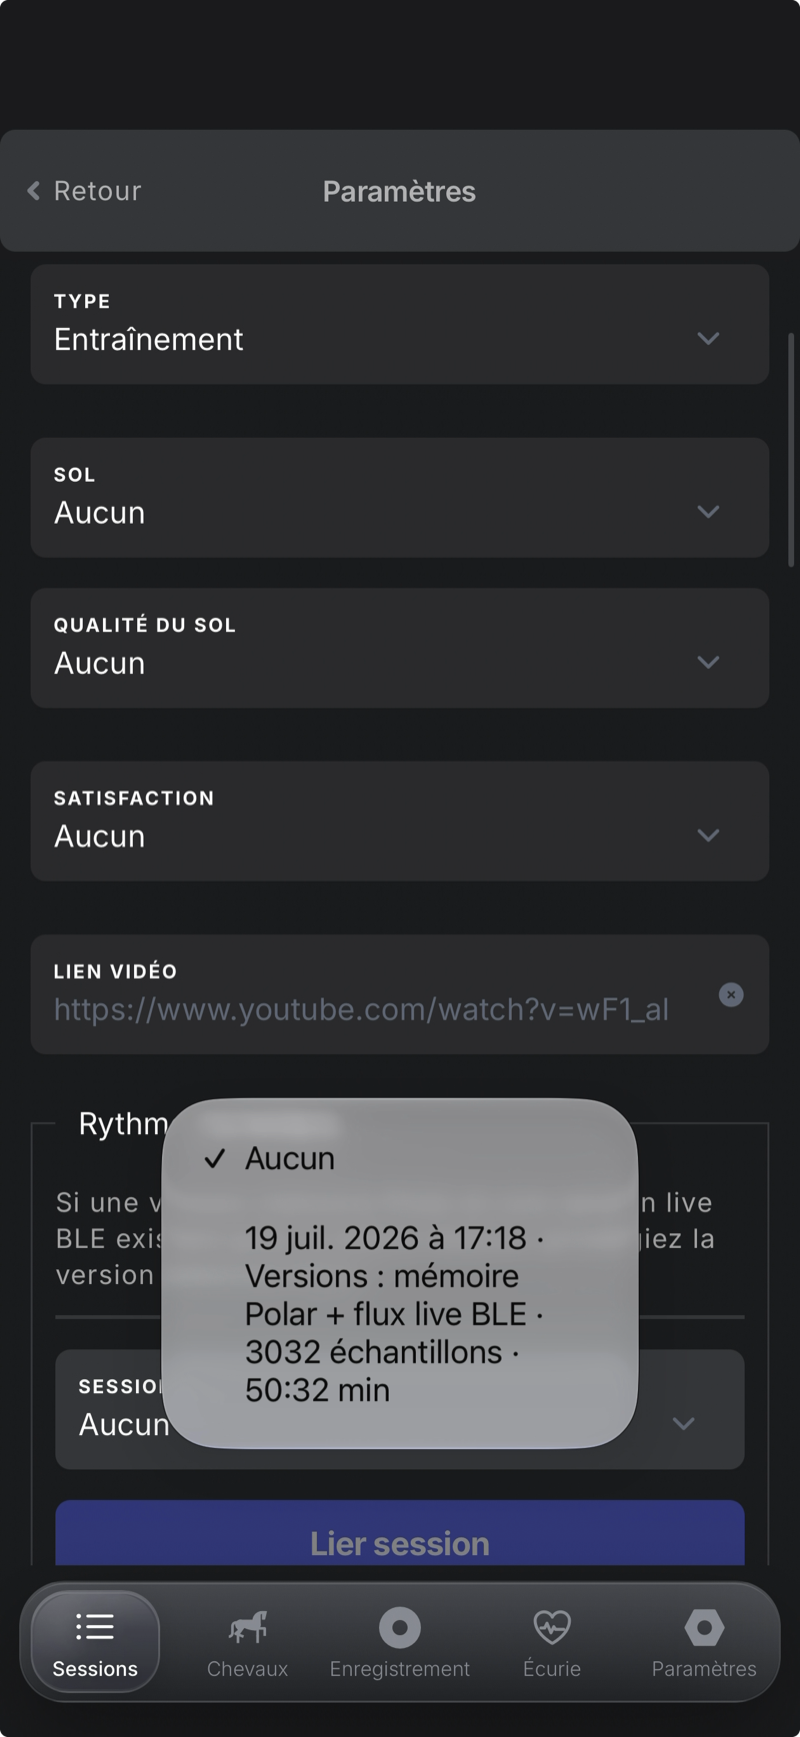
If both a Polar memory version and a live BLE version exist for the same ride, prefer the Polar memory version.
Racing interface
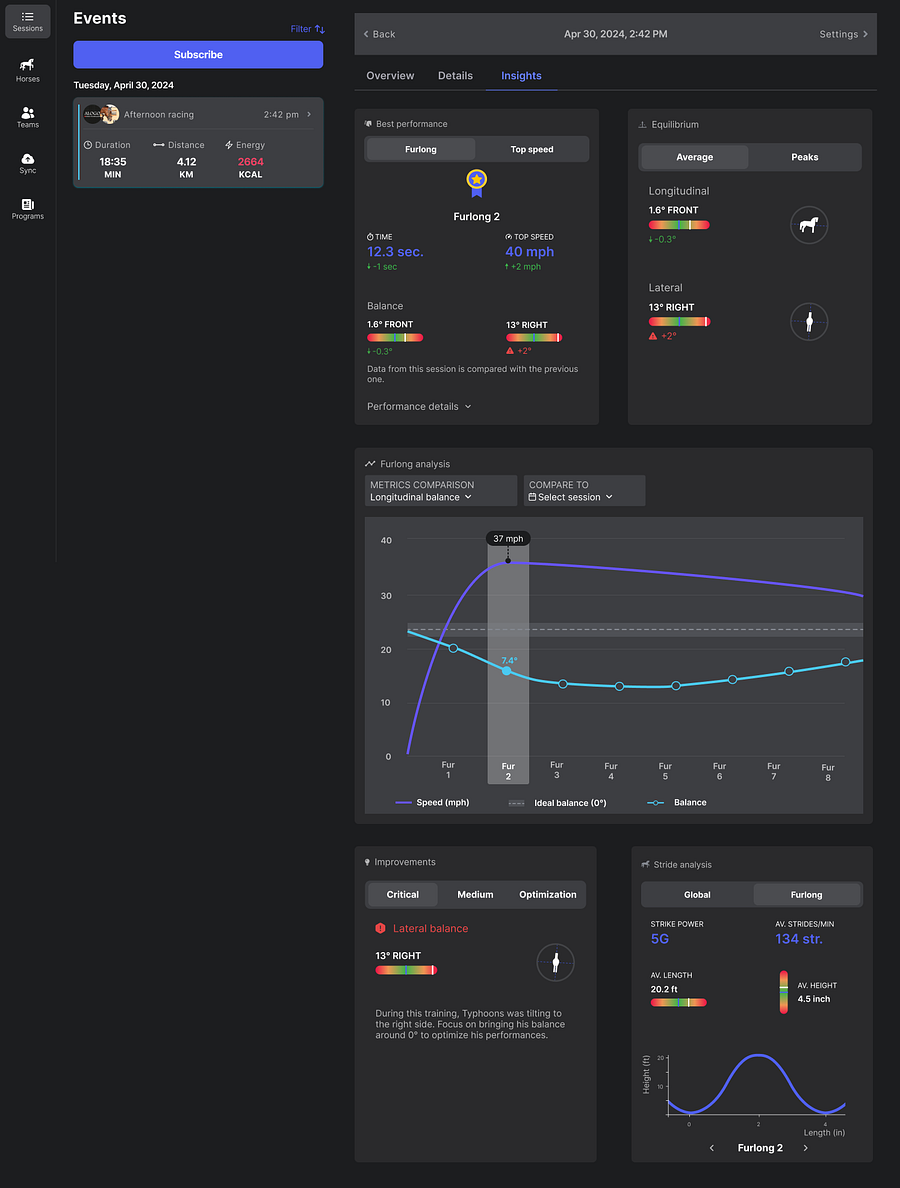
When a session’s discipline is set to Racing, the Insights tab switches to a furlong-based analysis: best performance (furlong / top speed), equilibrium (longitudinal & lateral balance), furlong-by-furlong speed and balance comparison, improvement advice and stride analysis.
Furlong analysis
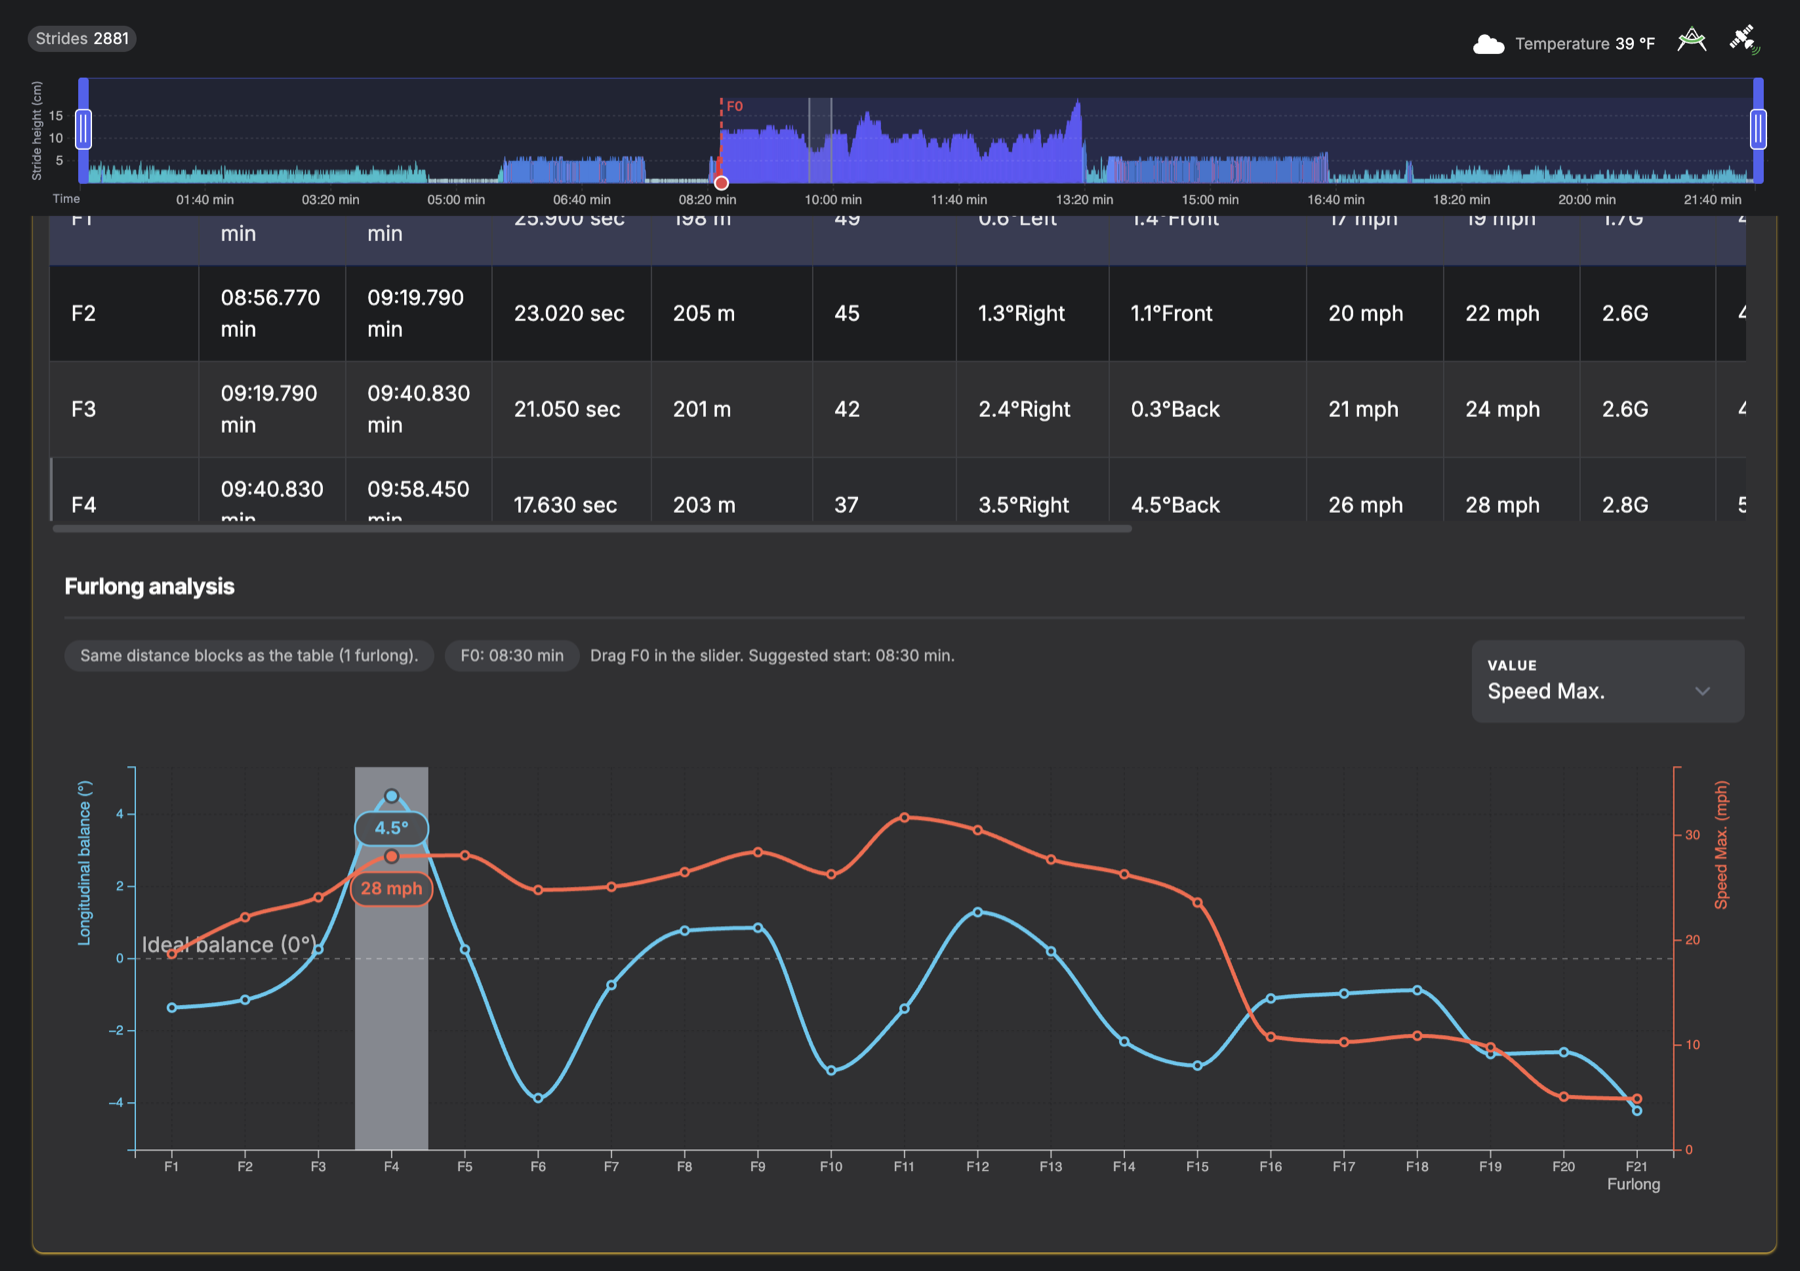
The race is broken down into furlongs, or 200 m blocks, depending on your language. Drag the F0 marker in the slider to set the start of the race. A suggested start is displayed. Each furlong gets its own row: time, duration, distance, strides, balance, speed…
In the Furlong analysis chart, the Value selector lets you compare the longitudinal balance against different metrics: Speed, Speed Max., Lateral balance, Avg. cadence, Stride power, Stride height (and Max.), Stride length or Energy.
Need help?
Team Alogo answers: real humans, in EN / FR / DE.
Include your session ID whenever your request concerns a specific session.